Amazing Sourdough Blueberry Bagels: A Joyful Bake
These vibrant Sourdough Blueberry Bagels fill your kitchen with the cozy aroma of tangy sourdough and sweet berries, and they’re so satisfying to make. This approachable recipe helps you confidently craft delicious, nourishing bagels right at home.
Why You’ll Fall in Love with This Recipe
- Incredible Flavor: The subtle tang of sourdough perfectly complements the sweet burst of blueberries. This combination creates a sophisticated, irresistible taste.
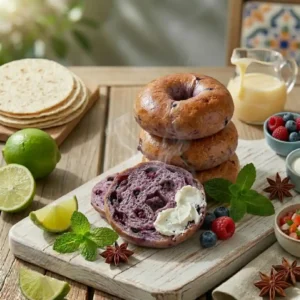
- Beautiful Color: Those mashed blueberries infuse the dough with a stunning purple hue, making each bagel a feast for your eyes.
- Amazing Chewiness: Sourdough fermentation and the boiling step create that signature, satisfying bagel chew.
- Deep Satisfaction: There’s nothing quite like pulling a tray of your own homemade Sourdough Blueberry Bagels from the oven.
- Gut-Friendly Goodness: Enjoy all the benefits of sourdough in a fun, breakfast-ready package.

Amazing Sourdough Blueberry Bagels
Ingredients
Equipment
Method
- WARM AND MASH BLUEBERRIES: Preheat oven or toaster oven to 350f. Warm frozen or fresh blueberries for 5-10 minutes or until blueberries are soft but have not fully burst. Using the back of a fork or spoon, mash the blueberries until they burst. Transfer everything (blueberries and juice) to a separate bowl to cool for 10-15 minutes. Mashed blueberries should be warm, NOT hot before adding to the dough. You want the berries soft and juicy, creating a rustic pulp that will color and flavor the dough.
- MIX DOUGH AND FIRST RISE: In a bowl or stand mixer, mix all ingredients together including the cooled mashed blueberries/juice. Place the dough hook on the mixer and mix the dough on the lowest speed for 3 minutes. Or mix by hand for a couple of minutes until a ball forms. Now, turn the dough onto a lightly floured surface and knead the dough for 3-4 minutes or until the dough is smooth. Lightly grease a bowl and place the dough inside. Cover the bowl with a lid, plastic wrap or a clean kitchen towel. Let the dough rise at room temperature for 6 – 8 hours or until it doubles in size. After kneading, your dough should feel elastic and smooth, not sticky or shaggy. It will grow significantly, becoming visibly larger and puffy, indicating the sourdough is working its magic.
- OVERNIGHT RISE: Place your dough covered in the fridge for overnight proof. This is where your dough will develop flavor and L.A.B bacteria will get to work enhancing the nutrition of our dough. Remember, the longer we ferment the better for us it gets! This cold rest allows for a slow, deep flavor development, creating that signature sourdough tang and chewy texture.
- DIVIDE AND SHAPE: Dump out and divide your dough into 8 pieces, you can eyeball it or weigh them out on a dough scale. If the dough is sticky, you can always add a little flour to your hands or dough before shaping (I usually do not need to). Shape each into a ball by pulling the corners up and over. Now, use your finger to poke a hole through the center of each ball and rotate the dough with two fingers to form a ring. Your dough will be chilled and easy to handle. Aim for smooth, taut balls, then gently stretch the hole to create a nice, open ring. Imagine gently stretching a rubber band around your finger.
- FINAL (SHORT) RISE: Place your bagels on a parchment-lined baking sheet and cover with a towel or plastic wrap and let it rest for 1-3 hours or until puffy to the touch. This short rise allows the bagels to relax and become airy. They should feel light and springy when gently poked, not dense.
- BOIL BAGELS: Preheat oven to 450f. Fill a large, wide pot water and bring to a boil. Drop bagels in, 2-4 at a time, making sure they have enough room to float around. Cook the bagels for 1 minute on each side and remove with a slotted spoon; drain well. Place on baking sheets and brush with egg wash. Boiling is essential; it sets the crust and creates that beloved chewy interior. Don’t overcrowd the pot, giving each bagel ample space to float and cook evenly.
- BAKE + ENJOY: Bake bagels for 17-20 minutes or until golden brown on the outside. Layer on grass-fed butter or your favorite cream cheese and enjoy every nourishing bite. Your bagels should have a deep golden-brown crust, especially where the egg wash was applied. They will smell incredible and be firm to the touch.

The Science Behind the Chew: Why Sourdough Blueberry Bagels Are a Gut-Friendly Treat
When you make Sourdough Blueberry Bagels, you’re tapping into the natural magic of fermentation. Wild yeast and lactic acid bacteria work together to break down complex carbohydrates and reduce certain anti-nutrients and FODMAPs, which can make these bagels easier to digest and more nutrient-friendly for your body. You can learn more about the potential health benefits of sourdough fermentation
Essential Ingredients for Your Sourdough Blueberry Bagels
Gathering your ingredients is the first joyful step to whipping up these beautiful Sourdough Blueberry Bagels. Each component plays a vital role in achieving that perfect texture and flavor.
- 400 g Bread Flour: This is key for that classic chewy bagel texture. Bread flour has a higher protein content than all-purpose flour, which develops more gluten. You may need to adjust water slightly depending on your specific flour’s absorption.
- 150 g Mashed (Warm Frozen Blueberries (37.5%)): Frozen blueberries are fantastic because they lend a richer, deeper blue color to your dough. Fresh blueberries work wonderfully too, but the color might be a little less intense. Mashing them releases their juices, which also contribute to the dough’s hydration.
- 100 g – 120g Water (25%): Adjust this amount based on your flour and the juiciness of your blueberries. You want a dough that’s pliable but not overly sticky.
- 100 g Sourdough Starter (25%): Make sure your starter is active and bubbly for the best rise and flavor.
- 8 g Sea Salt (2%): Salt is essential for flavor and also helps control fermentation.
- 10 g Honey (2.5%): Honey adds a touch of sweetness, enhances the flavor, and helps achieve a beautiful golden crust during baking.
- Olive Oil: You’ll use this to lightly grease the bowl or plate where your bagel dough will rise, preventing it from sticking.
- Eggs: You’ll brush your bagels with an egg wash prior to baking, which gives them a lovely shine and helps toppings adhere.
For another easy chill-and-serve treat, try Easy Oreo Truffles.
Equipment You’ll Need
- Stand Mixer: A stand mixer with a dough hook makes kneading a breeze, but you can certainly mix by hand!
- Large Mixing Bowls: For mixing and bulk fermentation.
- Dough Scale (optional but helpful): For precise dividing and consistent bagel sizes.
- Parchment Paper: Prevents sticking on baking sheets.
- Baking Sheets: You’ll need two to bake all your bagels.
- Large Wide Pot: Essential for boiling the bagels.
- Slotted Spoon: For carefully transferring boiled bagels.
- Pastry Brush: For applying the egg wash.
Step-by-Step: How to Craft Your Sourdough Blueberry Bagels
Let’s get cooking! Follow these simple steps for your journey to perfect Sourdough Blueberry Bagels. These instructions will guide you through each stage, helping you anticipate what your dough should look and feel like.
1. Warm and Mash Blueberries
WARM AND MASH BLUEBERRIES: Preheat oven or toaster oven to 350f. Warm frozen or fresh blueberries for 5-10 minutes or until blueberries are soft but have not fully burst. Using the back of a fork or spoon, mash the blueberries until they burst. Transfer everything (blueberries and juice) to a separate bowl to cool for 10-15 minutes. Mashed blueberries should be warm, NOT hot before adding to the dough. You want the berries soft and juicy, creating a rustic pulp that will color and flavor the dough.
2. Mix Dough and First Rise
MIX DOUGH AND FIRST RISE:In a stand mixer or bowl, combine all ingredients (including cooled mashed blueberries). With the dough hook, mix on low for 3 minutes (or by hand until a ball forms). Knead on a lightly floured surface for 3-4 minutes until smooth and elastic. Place in a greased bowl, cover, and let rise at room temperature for 6-8 hours until doubled and puffy.
3. Overnight Rise (Cold Fermentation)
OVERNIGHT RISE: Place your dough covered in the fridge for overnight proof. This is where your dough will develop flavor and L.A.B bacteria will get to work enhancing the nutrition of our dough. Remember, the longer we ferment the better for us it gets! This cold rest allows for a slow, deep flavor development, creating that signature sourdough tang and chewy texture.
4. Divide and Shape Your Sourdough Blueberry Bagels
DIVIDE AND SHAPE: Dump out and divide your dough into 8 pieces, you can eyeball it or weigh them out on a dough scale. If the dough is sticky, you can always add a little flour to your hands or dough before shaping (I usually do not need to). Shape each into a ball by pulling the corners up and over. Now, use your finger to poke a hole through the center of each ball and rotate the dough with two fingers to form a ring. Your dough will be chilled and easy to handle. Aim for smooth, taut balls, then gently stretch the hole to create a nice, open ring. Imagine gently stretching a rubber band around your finger.
5. Final (Short) Rise
FINAL (SHORT) RISE: Place your bagels on a parchment-lined baking sheet and cover with a towel or plastic wrap and let it rest for 1-3 hours or until puffy to the touch. This short rise allows the bagels to relax and become airy. They should feel light and springy when gently poked, not dense.
6. Boil Bagels
BOIL BAGELS: Preheat oven to 450f. Fill a large, wide pot water and bring to a boil. Drop bagels in, 2-4 at a time, making sure they have enough room to float around. Cook the bagels for 1 minute on each side and remove with a slotted spoon; drain well. Place on baking sheets and brush with egg wash. Boiling is essential; it sets the crust and creates that beloved chewy interior. Don’t overcrowd the pot, giving each bagel ample space to float and cook evenly.
7. Bake + Enjoy!
BAKE + ENJOY: Bake bagels for 17-20 minutes or until golden brown on the outside. Layer on grass-fed butter or your favorite cream cheese and enjoy every nourishing bite. Your bagels should have a deep golden-brown crust, especially where the egg wash was applied. They will smell incredible and be firm to the touch.
Troubleshooting Your Sourdough Blueberry Bagels: Common Questions & Solutions
Even experienced bakers run into little hiccups, and that’s perfectly okay! Here’s how to troubleshoot common issues with your Sourdough Blueberry Bagels.
- Dough too sticky/wet: This might mean too much water or juicy blueberries. Try adding a tablespoon of flour at a time during kneading until it’s more manageable.
- Dough too dry/stiff: Your flour might be absorbing more liquid. Add water, a teaspoon at a time, until the dough is pliable.
- Dough not rising: Check your sourdough starter activity – it needs to be bubbly and active. Also, ensure your kitchen isn’t too cold; a warmer spot can help.
- Blueberries bleeding too much: This can happen if berries are too hot or mashed too vigorously. Cooling them completely and a gentle mash helps.
- Bagels are flat or dense: This often points to under-proofing (not enough rise) or over-handling during shaping. Give them more time to puff up!
- Bagels are tough: Over-kneading can develop too much gluten, making them tough. Also, under-boiling won’t set the crust correctly.

Variations & Substitutions for Your Sourdough Blueberry Bagels
Get creative with your Sourdough Blueberry Bagels! Here are some fun ways to change things up:
| Ingredient/Component | Substitution/Variation | Notes |
|---|---|---|
| Bread Flour | All-Purpose Flour | Using AP flour will result in a slightly softer bagel with less chew. |
| Honey | Maple Syrup or Agave | These will affect the flavor profile slightly but work well as sweeteners. |
| Blueberries | Other berries, chocolate chips, dried fruit | Try raspberries, cranberries, white chocolate chips, or rehydrated dried cherries. Adjust hydration if using very wet or dry additions. |
| Egg Wash | Water or Milk | For a less shiny crust, or a dairy-free/vegan option, simply brush with water or plant milk. |
| Toppings | Sesame seeds, poppy seeds, “everything” seasoning | Apply these delicious toppings after the egg wash and before baking for extra flavor and texture. |
Storing Your Homemade Sourdough Blueberry Bagels
You’ll want to keep your delicious homemade Sourdough Blueberry Bagels fresh for as long as possible! They are best enjoyed the day they are baked.
- Room Temperature: Store cooled bagels in an airtight container or a paper bag for up to 2 days.
- Refrigeration: For slightly longer storage, you can refrigerate them in an airtight bag for up to 4-5 days. Toasting is highly recommended before serving.
- Freezing: For long-term storage, slice the bagels in half, then place them in a freezer-safe bag or container. They will last for up to 3 months. When ready to enjoy, simply pop a frozen half directly into the toaster, or let it thaw before toasting.
Frequently Asked Questions
- What’s the difference between store-bought bagels and Sourdough Blueberry Bagels? Homemade sourdough bagels offer a unique tangy flavor and chewy texture that traditional commercial bagels often lack. Plus, you control all the wholesome ingredients.
- Are Sourdough Blueberry Bagels healthier? Yes, the fermentation process can improve digestibility and nutrient availability compared to regular bagels. This makes them a more gut-friendly option for many people.
- Why do you have to boil Sourdough Blueberry Bagels before you bake them? Boiling gelatinizes the starches on the surface of the bagel, setting the crust and contributing to that iconic chewy texture. It is a crucial step for achieving a true bagel.
- How long do Sourdough Blueberry Bagels last? They are best on the day of baking but stay fresh at room temperature for 2 days. For longer enjoyment, slice and freeze them.
Conclusion
There’s such immense joy and satisfaction in creating something truly delicious from scratch, especially these incredible Sourdough Blueberry Bagels. I truly hope you feel empowered to try this recipe and experience the magic for yourself. The sweet aroma, the vibrant color, and that amazing chewy bite are all waiting for you.