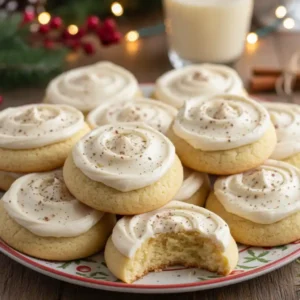
Irresistible Gooey Butter Cookies: A Taste of Pure Joy
Hello friends! I’m bursting to share these Gooey Butter Cookies—pure comfort with irresistible chewy, melt-in-your-mouth magic. This from-scratch recipe comes together in just 55 minutes for a quick, delicious treat .
Why You’ll Love These Gooey Butter Cookies
- Perfectly Chewy, Perfectly Tender: This recipe strikes a beautiful balance, giving you that signature gooey center with delightfully crisp edges. It’s a texture sensation you won’t forget!
- From Scratch Simplicity: While they taste incredibly decadent, these cookies are wonderfully straightforward to make. I’ll guide you every step of the way to cookie perfection.
- Guaranteed Crowd-Pleaser: Whether for a family gathering, a bake sale, or just a Tuesday treat, these cookies disappear fast. Their classic appeal is simply undeniable.
- Cozy Kitchen Magic: There’s something inherently comforting about baking these. The aroma alone will fill your home with warmth and happiness.

Gooey Butter Cookies (Made from Scratch!)
Ingredients
Equipment
Method
- In a large bowl, use an electric mixer to cream together butter and cream cheese until smooth and well-combined. Expert Tip: Make sure both the butter and cream cheese are truly at room temperature; this prevents any dreaded lumps and ensures a silky smooth start!
- Stir in the eggs and that wonderfully fragrant vanilla extract until everything is just combined. Don’t overmix here.
- In a separate bowl, whisk together the all-purpose flour, granulated sugar, baking powder, and salt. Expert Tip: Whisking these dry ingredients together thoroughly ensures that the leavening and salt are evenly distributed, leading to consistent cookies.
- With your electric mixer on a low speed, gradually add the dry ingredients to the butter/cream cheese mixture. Mix until everything is just combined and no dry streaks remain. Common Pitfall: Resist the urge to overmix the dough once the flour is added, as this can develop the gluten too much and make your cookies tough.
- Cover the bowl tightly with plastic wrap and pop it into the refrigerator to chill for at least 30 minutes. Expert Tip: Chilling the dough is crucial! It firms up the fats, making the dough much easier to handle and significantly preventing the cookies from spreading too much in the oven, helping maintain that perfect gooey center.
- While your dough is chilling, preheat your oven to 350°F (175°C). Line a baking sheet with parchment paper for easy cleanup and to prevent sticking. Pour your powdered sugar into a shallow bowl and set it aside.
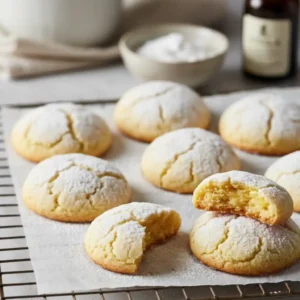
- Once the dough has chilled sufficiently, it’s time to form the cookies. Use a cookie scoop or measure about 1 ½ Tablespoons of dough. Roll each portion gently between your palms until you have a smooth ball. Then, roll the ball completely in the powdered sugar until it’s well-coated. Place the sugar-coated balls on your prepared baking sheet, making sure to space them at least 2 inches apart. Expert Tip: If the dough feels a bit sticky, you can lightly dampen your hands with water or oil them very lightly.
- Bake the cookies on the center rack of your preheated oven at 350°F (175°C) for 10-12 minutes. Expert Tip: You’re looking for cookies with edges that are just set, but the centers should still look slightly soft and underdone. This is the secret to that gooey texture! Common Pitfall: Avoid overbaking at all costs! They will continue to set as they cool. Let the Gooey Butter Cookies cool completely on the baking sheet before attempting to move them.

From Scratch vs. Cake Mix: Choosing Your Gooey Butter Cookie Adventure
When it comes to Gooey Butter Cookies, you have a couple of popular paths you can take: the “from scratch” method and the “cake mix” shortcut. Both can yield delicious results, but they offer distinct experiences!
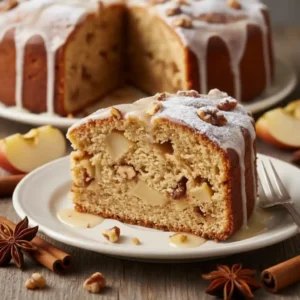
Making these cookies from scratch, like in this recipe, gives you a beautiful depth of flavor and a wonderful texture that’s truly unmatched. You have complete control over every ingredient, allowing for that perfect balance of sweet, rich, and slightly tangy notes. The texture is often more tender and nuanced, with a delightful chew. It’s a bit more hands-on, but the reward is a cookie that tastes authentically homemade and truly special. If you love cozy, from-scratch bakes, you might also enjoy our Apple Cinnamon Cake recipe.
On the other hand, using a cake mix is a fantastic way to achieve a Gooey Butter Cookie in a flash! It’s incredibly convenient and often results in a slightly more cake-like cookie. This can be a great option when time is super tight or if you’re a beginner baker looking for a foolproof starting point. You can experiment with different cake mix flavors for fun twists, though the overall flavor profile might be a bit simpler than the scratch version. For another classic fruit-forward dessert, try this Dutch Apple Pie recipe.
For me, the true magic lies in the from-scratch approach. The careful combination of butter, cream cheese, and the dry ingredients creates a cookie with unparalleled richness and that signature melt-in-your-mouth quality.
Our Carefully Selected Ingredients
Every great cookie starts with thoughtful ingredients, and these Gooey Butter Cookies are no exception! I’ve chosen each component to ensure the best possible flavor and texture.
- ½ cup unsalted butter (softened)
- 8 oz brick-style cream cheese (softened)
- 2 large eggs (room temperature preferred)
- 1 ½ Tablespoons vanilla extract
- 3 cups all-purpose flour
- 1 ½ cups granulated sugar
- 2 teaspoons baking powder
- 1 teaspoon salt
- Powdered sugar (for rolling cookies)
Mastering the Art of Gooey Butter Cookies: Step-by-Step Magic
Now for the fun part – bringing these delicious Gooey Butter Cookies to life! It’s simpler than you might think. And if you’re in the mood for a savory bake between cookie batches, this no-knead crusty bread is a rewarding project.
- Creamy Base: In a large bowl, grab your electric mixer. Cream together the softened butter and softened brick-style cream cheese until they are perfectly smooth and well-combined. Expert Tip: Make sure both the butter and cream cheese are truly at room temperature; this prevents any dreaded lumps and ensures a silky smooth start!
- Adding Wet Ingredients: Stir in the eggs and that wonderfully fragrant vanilla extract until everything is just combined. Don’t overmix here.
- Dry Ingredients Unite: In a separate bowl, whisk together the all-purpose flour, granulated sugar, baking powder, and salt. Expert Tip: Whisking these dry ingredients together thoroughly ensures that the leavening and salt are evenly distributed, leading to consistent cookies.
- Combining Wet and Dry: With your electric mixer on a low speed, gradually add the dry ingredients to the butter/cream cheese mixture. Mix until everything is just combined and no dry streaks remain. Common Pitfall: Resist the urge to overmix the dough once the flour is added, as this can develop the gluten too much and make your cookies tough.
- Chill Out: Cover the bowl tightly with plastic wrap and pop it into the refrigerator to chill for at least 30 minutes. Expert Tip: Chilling the dough is crucial! It firms up the fats, making the dough much easier to handle and significantly preventing the cookies from spreading too much in the oven, helping maintain that perfect gooey center.
- Preheat and Prep: While your dough is chilling, preheat your oven to 350°F (175°C). Line a baking sheet with parchment paper for easy cleanup and to prevent sticking. Pour your powdered sugar into a shallow bowl and set it aside.
- Scoop and Roll: Once the dough has chilled sufficiently, it’s time to form the cookies. Use a cookie scoop or measure about 1 ½ Tablespoons of dough. Roll each portion gently between your palms until you have a smooth ball. Then, roll the ball completely in the powdered sugar until it’s well-coated. Place the sugar-coated balls on your prepared baking sheet, making sure to space them at least 2 inches apart. Expert Tip: If the dough feels a bit sticky, you can lightly dampen your hands with water or oil them very lightly.
- Bake to Perfection: Bake the cookies on the center rack of your preheated oven at 350°F (175°C) for 10-12 minutes. Expert Tip: You’re looking for cookies with edges that are just set, but the centers should still look slightly soft and underdone. This is the secret to that gooey texture! Common Pitfall: Avoid overbaking at all costs! They will continue to set as they cool. Let the Gooey Butter Cookies cool completely on the baking sheet before attempting to move them.
Expert Tips for Perfectly Executed Gooey Butter Cookies
Beyond the basic steps, a few insider tips can elevate your Gooey Butter Cookie game! I’ve learned these through countless batches, and they truly make a difference.
- Flour Measurement Matters: Always use the spoon and level method for measuring flour. Spoon the flour into your measuring cup, then use a straight edge (like the back of a knife) to level off the excess. Scooping directly from the bag can pack too much flour in, leading to drier, cakier cookies.
- Room Temperature Ingredients, Fast: If your butter or cream cheese isn’t softened, don’t despair! You can cut them into smaller cubes and let them sit on the counter for about 15-20 minutes. For eggs, place them in a bowl of warm (not hot) water for a few minutes.
- Essential Equipment: A good quality cookie scoop (around 1.5 to 2 tablespoons) ensures uniform cookie size for even baking. And parchment paper is your best friend for easy cleanup and preventing sticking. Trust me, it’s a game-changer!
- Dough Consistency Cues: After chilling, the dough should be firm enough to scoop and roll without being overly sticky or crumbly. If it’s too sticky, it needs a bit more chilling time. If it feels too stiff, let it sit at room temperature for a few minutes before scooping.

Troubleshooting Your Gooey Butter Cookie Creations
Even the most seasoned bakers encounter little hiccups now and then! Don’t let a minor issue discourage you. Here are some common Gooey Butter Cookie conundrums and how to solve them:
| Problem | Likely Cause | Solution |
|---|---|---|
| Cookies spreading too much | Butter/cream cheese too soft; dough not chilled enough | Ensure butter and cream cheese are softened, not melted. Chill dough thoroughly (at least 30 mins). |
| Cookies not gooey enough | Overbaked | Watch cookies closely; remove when centers still look slightly soft. They finish baking on the sheet. |
| Dough is too sticky | Chilling time too short; ingredients too warm | Chill dough for an additional 15-30 minutes. Lightly oil hands or use a cookie scoop. |
| Cookies taste too cakey | Too much flour; overmixed dough | Measure flour correctly (spoon & level). Mix dry ingredients into wet until just combined. |
Creative Variations and Fun Mix-Ins
While classic Gooey Butter Cookies are divine, don’t be afraid to play around and make them your own! Here are a few ideas to spark your creativity.
- Flavor Variations: Add a teaspoon of almond extract along with the vanilla for a nutty twist. You could even try a touch of lemon zest for brightness.
- Delicious Mix-Ins: Fold in about ½ cup of white chocolate chips, chopped pecans, or even some colorful sprinkles into the dough after chilling and before scooping.
- Toppings & Glazes: For an extra special touch, whip up a simple glaze with powdered sugar and a splash of milk or lemon juice to drizzle over the cooled cookies.
- Seasonal Fun: Roll some cookies in green and red sugar for Christmas, or add pastel sprinkles for Easter. Pumpkin spice and cinnamon work wonders in the fall!
Delicious Dietary Adaptations for Gooey Butter Cookies
I believe everyone should enjoy a delicious Gooey Butter Cookie! While these are traditionally made with standard ingredients, here are some ideas for dietary adaptations:
- Gluten-Free: You can often achieve great results by substituting a 1-to-1 gluten-free baking flour blend for the all-purpose flour. Ensure your blend contains xanthan gum. Some gluten-free cake mixes can also be used as a base for a cake-mix style cookie if you prefer that route.
- Reduced Sugar: For a less sweet cookie, you can try using a sugar-free cake mix as a base if you opt for that method. In the scratch recipe, reducing the granulated sugar significantly might alter the texture, but you could try replacing a portion with a sugar substitute designed for baking. Be aware this may affect the final gooeyness.
Storing, Freezing, and Enjoying Your Gooey Butter Cookies
Proper storage ensures your Gooey Butter Cookies stay delightfully soft and delicious!
- Room Temperature: Store baked cookies in an airtight container at room temperature for 3-4 days. Adding a slice of bread to the container can help maintain their soft texture.
- Freezing Baked Cookies: Wrap cooled cookies tightly in plastic wrap, then place them in a freezer-safe bag or container. They’ll keep well for up to 2 months. Thaw them overnight at room temperature.
- Freezing Dough: You can freeze the rolled, powdered-sugar-coated dough balls on a baking sheet until firm, then transfer them to a freezer bag. Bake directly from frozen, adding a minute or two to the baking time.
Frequently Asked Questions
- Where did gooey butter cookies originate? These delightful cookies are a St. Louis specialty! They were reportedly invented by accident in the 1930s by a baker trying to make a butter cookie.
- Why do some recipes call for so much vanilla? A generous amount of vanilla extract is crucial for that classic, rich flavor that defines a true Gooey Butter Cookie. It balances the sweetness and enhances the buttery notes.
- Can I use tub cream cheese instead of brick-style? While you can, brick-style cream cheese is highly recommended. Tub-style has more water and can lead to cookies that spread too much and lose their signature texture.
- How do I know when my cookies are done? Your Gooey Butter Cookies are ready when the edges look set and lightly golden, but the centers still appear soft and slightly underbaked. They will continue to firm up as they cool.
A Final Note from My Kitchen
Baking these Gooey Butter Cookies truly fills my heart (and my kitchen!) with so much warmth and joy. I hope you feel that same happiness as you create and share these delightful treats. They are a testament to how simple, good ingredients and a little bit of love can create something truly magical.