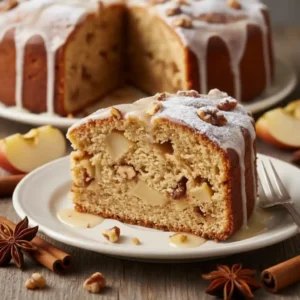
The Ultimate Dutch Apple Pie: A Cozy, Comforting Classic
Hello bakers! this classic Dutch Apple Pie is a cozy hug, blending tender apples with crunchy, sweet topping. My tried-and-true favorite takes 1 hour 30 minutes (including chilling) for a beautiful, delicious pie to share.
What Makes This Dutch Apple Pie So Special?
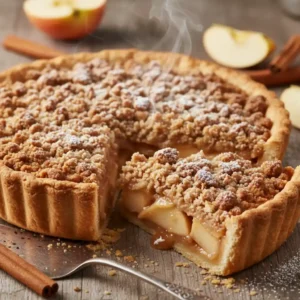
A Dutch Apple Pie gets its name from the glorious, buttery streusel crumble topping—no top crust here! This recipe shines with sweet-tart apples in a flaky homemade crust, crowned by perfectly crunchy topping for an easy, comforting classic.

The Ultimate Dutch Apple Pie Recipe
Ingredients
Equipment
Method
- In medium bowl, mix 1 cup flour and the salt. Cut in shortening, using pastry blender (or pulling 2 table knives through ingredients in opposite directions), until particles are size of small peas. Sprinkle with cold water, 1 tablespoon at a time, tossing with fork until all flour is moistened and pastry almost leaves side of bowl (1 to 2 teaspoons more water can be added if necessary). Gather pastry into a ball. Shape into flattened round on lightly floured surface. Wrap flattened round of pastry in plastic wrap, and refrigerate about 45 minutes or until dough is firm and cold, yet pliable. This allows the shortening to become slightly firm, which helps make the baked pastry more flaky. If refrigerated longer, let pastry soften slightly before rolling.
- Heat oven to 400°F (200°C). On surface sprinkled with flour, using floured rolling pin, roll pastry dough into circle 2 inches larger than 9-inch pie plate. Fold pastry into fourths; place in pie plate. Unfold and ease into plate, pressing firmly against bottom and side and being careful not to stretch pastry, which will cause it to shrink when baked. Trim overhanging edge of pastry 1 inch from rim of pie plate. Fold and roll pastry under, even with plate; flute as desired.
- In large bowl, toss Filling ingredients. Pour into pie plate, mounding apples toward center.
- In medium bowl, use pastry blender or fingers to mix butter, 1 cup flour and the brown sugar until a crumb forms. Sprinkle evenly over top of pie. Sprinkle 1 tablespoon granulated sugar on top.
- Bake 45 to 55 minutes or until pie crust and crumb topping are deep golden brown and filling begins to bubble. Transfer to cooling rack to cool.

Ingredients You’ll Need
Crust Ingredients
- All-purpose flour
- Salt
- Shortening (cold)
- Ice-cold water
Apple Filling Ingredients
- Apples (Granny Smith, Honeycrisp, Fuji, or Gala)
- Granulated sugar
- All-purpose flour (as thickener)
- Ground cinnamon
- Lemon juice
Streusel Topping Ingredients
- Unsalted butter (softened)
- All-purpose flour
- Brown sugar (packed)
- Granulated sugar
- Optional: Rolled oats or demerara sugar
Try this easy chocolate trifle for a show-stopping finish with minimal effort.
Step-by-Step Dutch Apple Pie Assembly
Let’s bring it all together!
- Prepare the Crust: In a medium bowl, whisk together 1 cup of flour and ½ teaspoon of salt. Cut in ⅓ cup plus 1 tablespoon of shortening until the mixture resembles coarse crumbs with pea-sized pieces. Gradually add 2 to 3 tablespoons of cold water, mixing with a fork until the dough just comes together. Gather the dough into a ball, flatten it into a disk, wrap it in plastic, and refrigerate for at least 45 minutes.
- Preheat and Roll: Preheat your oven to 400°F (200°C). On a lightly floured surface, roll out the chilled dough into a circle about 12 inches in diameter. Carefully transfer the dough to your 9-inch pie plate, gently pressing it into the bottom and up the sides. Trim the overhang to about 1 inch, then fold the edge under and flute it decoratively.
- Prepare the Filling: In a large bowl, toss 8 cups of sliced apples with ½ cup granulated sugar, ¼ cup flour, ¼ teaspoon cinnamon, and 1 tablespoon lemon juice. Pour the apple mixture into the prepared pie crust, mounding them slightly in the center.
- Make the Topping: In a separate medium bowl, combine ½ cup softened butter, 1 cup flour, and ⅔ cup packed brown sugar. Use a pastry blender or your fingers to mix until a crumbly texture forms. Evenly sprinkle this crumble mixture over the apples.
- Final Touch & Bake: Sprinkle 1 tablespoon of granulated sugar over the topping. To prevent the edges from burning, you can cover them with a pie shield or strips of aluminum foil. Bake for 45 to 55 minutes, or until the crust and topping are a deep golden brown and the filling is bubbling. If you removed the foil shield, you might do so for the last 15-20 minutes of baking.
Essential Tools for Your Pie-Making Journey
- Pastry Blender or Food Processor
- Rolling Pin (wooden or marble)
- 9-Inch Pie Plate (glass, ceramic, or metal)
- Large Mixing Bowls
- Measuring Cups and Spoons
- Apple Peeler/Corer/Slicer
- Bench Scraper
- Pie Shield or Aluminum Foil
The Perfect Streusel Topping (It’s All About the Crumble!)
Oh, the magic’s in this Dutch Apple Pie topping! Mix softened unsalted butter, extra flour, packed brown sugar (for caramel depth), and a touch of granulated sugar for crispness—using a pastry blender or fingertips until coarse, with fine crumbs to pea-sized bits (don’t overmix to paste!). Add ½ cup rolled oats for richer crunch, or mix brown and demerara sugars for extra crispness.
To ensure this lovely crumble bakes up perfectly golden and doesn’t burn, we’ll talk about placement and potentially using parchment paper or foil later in the instructions. You can find more tips on achieving the perfect crumble texture from sources like Serious Eats.
Troubleshooting Common Dutch Apple Pie Pitfalls
Even the best bakers run into a few hiccups sometimes! Don’t worry, we can fix those Dutch Apple Pie problems.
- Soggy Bottom Crust: This is the most common complaint! To combat this, ensure your oven is fully preheated, and consider baking the pie on the lowest rack for the first part of the bake. Another trick is to blind-bake the bottom crust for about 10-15 minutes before adding the filling, or pre-cooking the apple filling slightly as we do in this recipe.
- Runny Filling: If your filling seems too watery, it might be from using apples with very high water content or not using enough flour/thickener in the filling. Ensure your apples are sliced uniformly and allow the pie to cool completely before slicing; the juices will continue to thicken as it cools.
- Burnt Topping or Crust Edges: As mentioned, using a pie shield or loosely tenting the edges with foil for the latter half of baking is your best bet. Also, ensure your oven temperature is accurate.
- Apples Too Hard or Mushy: Slicing the apples uniformly is key for even cooking. If they’re still too firm, you can tent the pie with foil and bake for an additional 10-15 minutes. If they’re mushy, you likely overcooked them initially or used a very soft apple variety.

Delicious Dairy-Free & Gluten-Free Dutch Apple Pie Variations
Making a Dutch Apple Pie that fits your dietary needs is absolutely possible! Here are some simple swaps:
| Dietary Need | Crust Substitute | Topping Substitute | Filling Notes |
|---|---|---|---|
| Dairy-Free | Use vegetable shortening or a vegan butter substitute. | Use vegan butter substitute or coconut oil (solidified). | Naturally dairy-free! |
| Gluten-Free | Use a good quality 1:1 gluten-free flour blend. | Use gluten-free flour blend and certified gluten-free oats. | Ensure thickener (flour/cornstarch) is gluten-free. |
| Both | Use GF flour blend & vegan butter/shortening. | Use GF flour blend, vegan butter, and GF oats. | Ensure all thickeners are GF and ingredients are DF. |
Remember to check that your chosen substitutions are suitable for baking, as their water content and behavior can vary.
Mastering Make-Ahead & Freezing Techniques
Life gets busy, right? I love that you can prepare components of this Dutch Apple Pie ahead of time!
- Crust: Make the pie dough up to 2 days in advance and keep it wrapped in the refrigerator. You can also freeze the disk of dough for up to 3 months; thaw it overnight in the fridge before rolling.
- Filling: The apple filling can be mixed and stored in an airtight container in the refrigerator for up to 2 days. Toss with lemon juice right before mixing to prevent browning.
- Topping: The streusel topping can be made a day ahead and stored in an airtight container in the fridge.
- Freezing the Pie: You can freeze the unbaked pie. Assemble the pie completely, then wrap it tightly in plastic wrap followed by a layer of aluminum foil. Freeze for up to 3 months. To bake, remove the foil and plastic wrap and bake from frozen, adding about 15-20 minutes to the baking time. You may need to cover the edges earlier.
- Freezing Baked Pie: Allow the baked pie to cool completely. Wrap tightly in plastic wrap and then foil. Freeze for up to 2 months. Thaw overnight in the refrigerator and reheat gently in a 300°F (150°C) oven for about 15-20 minutes until warmed through.
Serving Your Masterpiece
This Dutch Apple Pie is divine on its own, but oh, the possibilities for serving! A scoop of vanilla bean ice cream is a classic for a reason – the cold creaminess against the warm, spiced apples is pure bliss. A dollop of freshly whipped cream adds a lighter touch. For a true North Carolina twist, try a slice with a sharp cheddar cheese – the salty, tangy cheese cuts through the sweetness beautifully. You could also drizzle a little caramel sauce or even a crème anglaise over the top for an extra touch of indulgence.
A Slice of History: The Origins of Dutch Apple Pie
“Dutch Apple Pie” is misleading—it’s not from the Netherlands but likely refers to “Deutsch” (German) or Dutch crumb-textured fritters. The American version evolved with its signature streusel topping, blending traditions into a beloved home staple.
Frequently Asked Questions
Q: What kind of apples are best for Dutch Apple Pie? A: A mix of tart and sweet apples works best! Granny Smith provides tartness and holds its shape, while Honeycrisp, Fuji, or Gala add sweetness and juiciness.
Q: How do I prevent my Dutch Apple Pie from becoming soggy? A: Ensure your oven is fully preheated, consider baking on the lowest rack, pre-cook your filling slightly, and always let the pie cool completely before slicing.
Q: Can I make the crust and topping ahead of time? A: Yes! The crust dough and streusel topping can be made a day or two in advance and stored in the refrigerator.
Q: How long does Dutch Apple Pie last? A: Leftover pie can be stored loosely covered at room temperature for up to 2 days or in the refrigerator for up to 4-5 days.
Baked to Perfection: Temperature and Doneness Guide
Start with a high 400°F (200°C) oven for crispy crust, holding steady as this recipe directs. Done when crust and topping are deep golden brown, filling bubbles visibly, and internal temp hits 195-200°F (90-93°C). Use a pie shield or foil if edges brown too fast! You can find further guidance on pie baking temperatures and doneness indicators at King Arthur Baking.
Conclusion
There you have it – a recipe for a truly comforting and spectacular Dutch Apple Pie! From the flaky, homemade crust to the perfectly spiced apple filling and that irresistible crumbly topping, this pie is a labor of love that’s so rewarding to make and even more delightful to share. I truly hope you’ll give this classic recipe a try and bring a little extra cozy joy into your kitchen. Don’t hesitate to leave a comment below with your baking adventures, ask any questions you might have, or share a photo of your delicious creation! Happy baking!