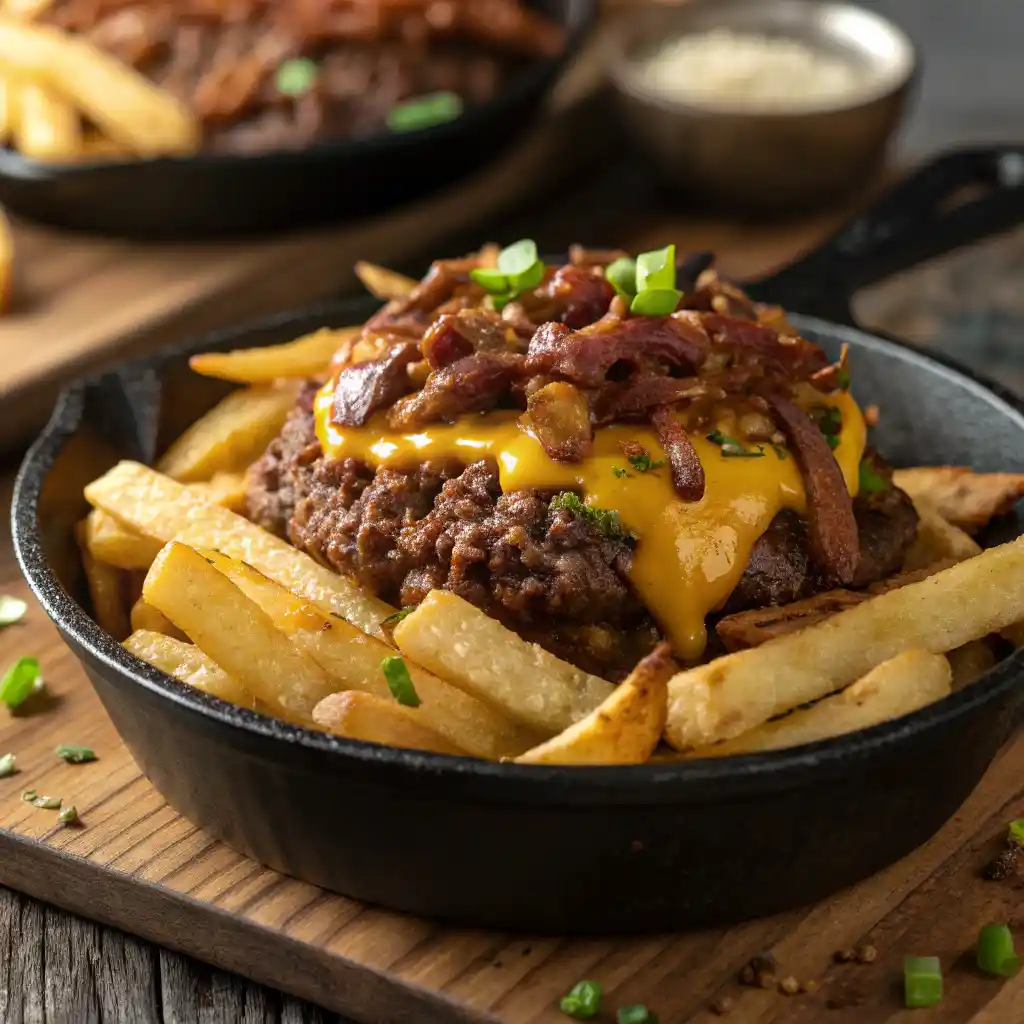
Hello, wonderful cooks! Sarah here from The Meal Craft, and oh, do I have a treat for you today! Sometimes, you just need a meal that brings pure joy and a bit of playful indulgence to the table. That’s exactly what these Cheeseburger Loaded Fries are all about! They take that classic diner experience and elevate it into a cozy, comforting dish perfect for sharing (or not!). In approximately 60-75 minutes from start to finish, you’ll have a hearty, flavorful dish that truly satisfies. I just know you’re going to adore this recipe.
Table of Contents
Why You’ll Love These Cheeseburger Loaded Fries
I designed this recipe to be your go-to for ultimate comfort food, with a few special touches.
- Seriously Crispy Fries: We bake or air fry our Russet potatoes until they reach golden-brown perfection, ensuring a fantastic crunch.
- Flavor-Packed Beef: The ground beef simmers in a tangy, savory burger sauce, infusing every bite with delicious, classic flavor.
- Perfect Melty Cheese: Layers of American cheese create that ooey-gooey goodness we all crave on top of our Cheeseburger Loaded Fries.
- Infinitely Customizable: This dish is a blank canvas for your favorite toppings, making it fun for everyone to personalize.
Ultimate Cheeseburger Loaded Fries Delight!
Ingredients
Equipment
Method
- Begin by tossing your freshly cut Russet potatoes with the olive oil, black pepper, and garlic powder until they are evenly coated. Spread them in a single layer on a half sheet pan or large baking sheet. Bake at 450ºF for 50-60 minutes, flipping halfway, until they are wonderfully crispy and golden brown. If you prefer, an air fryer works beautifully too! Air fry at 400ºF for about 40 minutes, remembering to shake the basket every 15-20 minutes for even crisping.
- During the last 15 minutes of your fries baking, start on the toppings. Cook the smoked beef bacon pieces in a pan over medium-high heat until they are perfectly crispy. Transfer the cooked bacon to a paper towel-lined plate to drain, saving that flavorful rendered fat! Next, brown the ground beef in the remaining bacon butter. Break it apart with a spoon as it cooks until it’s fully browned. Turn off the heat and stir in the sugar-free ketchup, light mayo, Dijon mustard, Worcestershire sauce, and pickle juice. Mix everything thoroughly until the sauce has thickened and coated the beef beautifully.
- Once the fries are done and glistening, remove them from the oven. Season them with a few pinches of kosher salt to taste. You can either gently push all the fries together into the center of the sheet pan, or for a cozier presentation, transfer them to a quarter sheet pan or a cast iron skillet.
- Evenly place half of the American cheese slices over the fries, followed by the flavorful ground beef mixture. Finish by layering the remaining cheese slices on top. Pop it back into the oven for just 2-3 minutes, or until the cheese is gloriously melted and bubbly.
- The grand finale! Remove your magnificent Cheeseburger Loaded Fries from the oven. Sprinkle with the crispy cooked smoked beef bacon pieces. Now comes the fun part: add your favorite toppings! Fresh chives, tangy diced pickles or relish, or a handful of chopped pickled peppers are always a hit. Serve immediately while everything is hot and gooey, and enjoy every single bite!
Notes
- Crispy Fries: For homemade, use Russet potatoes. Soak them in cold water, pat completely dry, and bake at 450°F in a single layer. An air fryer also works great for extra crispiness.
- Best Cheese: American cheese provides the smoothest melt. For best results, layer half the cheese, then the beef, then the rest of the cheese. If using other cheeses like cheddar, shred your own to avoid additives and ensure a better melt.
- Flavorful Beef: Enhance the flavor with additions like smoky paprika or a splash of beef broth. To get a good flavor crust, sear the beef in a pan that is not overcrowded.
- Make-Ahead: You can cook the beef mixture, mix the burger sauce, and chop toppings 1-2 days in advance. Store each component separately in airtight containers in the refrigerator.
-
Troubleshooting:
- Soggy Fries: Ensure fries are in a single layer and serve immediately.
- Bland Beef: Taste and adjust seasonings before serving.
- Separated Cheese Sauce: Add cheese gradually over low heat. Fix it by whisking in a splash of warm milk.
- Reheating Leftovers: Store in an airtight container for up to 2 days. The best way to reheat is in an oven or air fryer at 350°F to restore crispness. Avoid the microwave, as it will make the fries soggy.
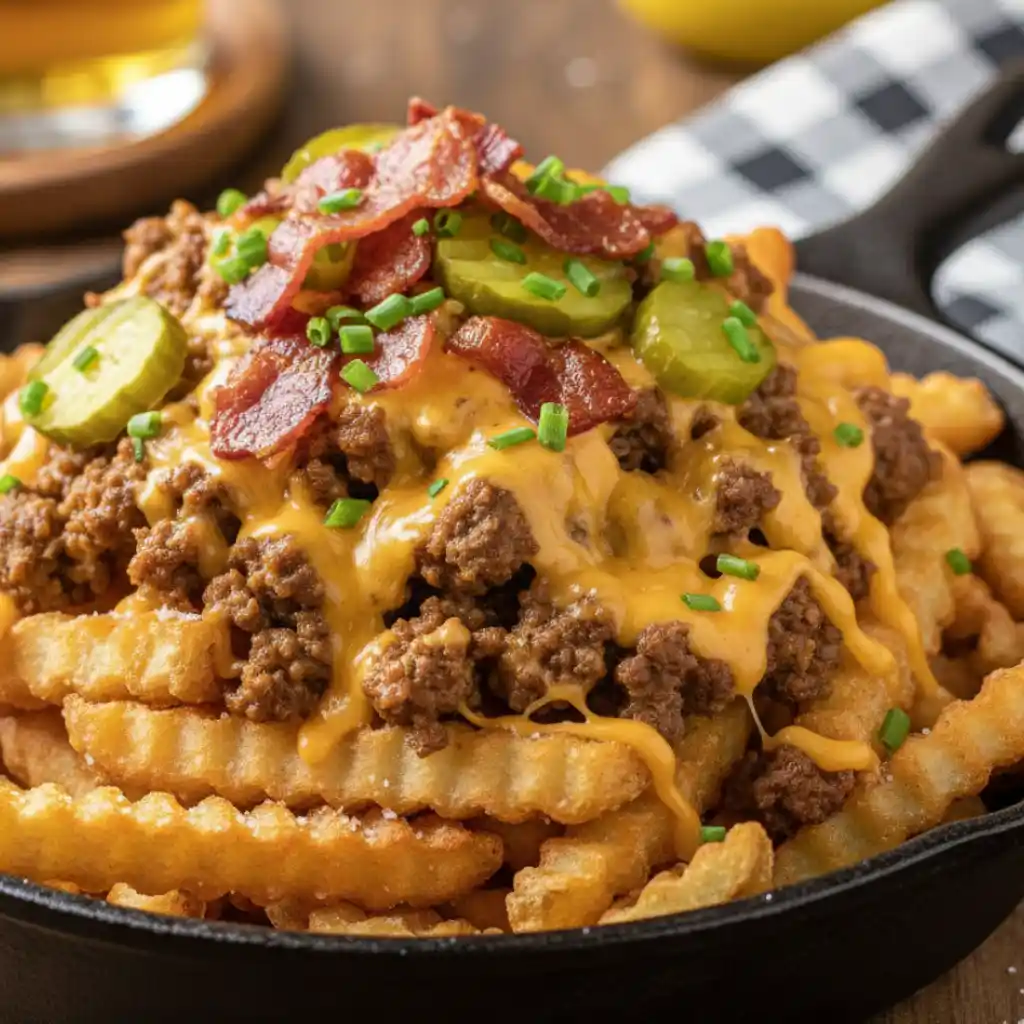
Ingredients You’ll Need for Cheeseburger Loaded Fries
Gather these simple ingredients to create your masterpiece. Each component plays a vital role in building incredible flavor and texture.
- For the Crispy Fries:
- 2 pounds Russet Potatoes, cut into fries: These potatoes are perfect for fries because their high starch content yields a fluffy interior and crisp exterior.
- 2 tablespoons (32g) Olive Oil: Helps the fries crisp up beautifully in the oven or air fryer.
- 1 teaspoon Garlic Powder: Adds a foundational aromatic flavor to our fries.
- 1/4 teaspoon Black Pepper: A hint of spice to complement the garlic.
- 2-3 pinches Kosher Salt, to taste: Essential for enhancing the flavor of the potatoes.
- For the Burger Sauce & Beef:
- 4 slices smoked beef bacon, cut into small pieces: Provides a smoky, salty crunch and renders fat for browning the beef.
- 1 pound Ground Beef (96/4): A leaner blend works well here to prevent the dish from becoming greasy.
- 1/4 cup (68g) Sugar Free Ketchup: Adds a sweet and tangy base to our burger sauce.
- 2 tablespoons (30g) Light Mayo: Contributes creaminess and a subtle richness.
- 2 tablespoons (30g) Dijon Mustard: Offers a sharp, complex flavor that balances the other sauce ingredients.
- 2 tablespoons (30g) Worcestershire Sauce: Deepens the savory umami notes in the beef.
- 2 tablespoons (30g) Pickle Juice: Provides a zesty tang, echoing classic burger flavors.
- For the Melty Cheese & Toppings:
- 4 oz American Cheese Slices: Melts incredibly smoothly, giving you that iconic cheesy pull.
- butter: Just a touch to help brown the ground beef.
- Your choice of toppings (e.g., chives, diced pickles or relish, chopped pickled peppers, etc.): Customize to your heart’s desire!
Crafting Your Ultimate Cheeseburger Loaded Fries (Step-by-Step)
Let’s get cooking! Follow these simple steps to bring your delicious Cheeseburger Loaded Fries to life. I promise, it’s easier than you think, and so much fun!
- Prep and Bake the Fries: Begin by tossing your freshly cut Russet potatoes with the olive oil, black pepper, and garlic powder until they are evenly coated. Spread them in a single layer on a half sheet pan or large baking sheet. Bake at 450ºF for 50-60 minutes, flipping halfway, until they are wonderfully crispy and golden brown. If you prefer, an air fryer works beautifully too! Air fry at 400ºF for about 40 minutes, remembering to shake the basket every 15-20 minutes for even crisping.
- Cook the Bacon and Beef: During the last 15 minutes of your fries baking, start on the toppings. Cook the smoked beef bacon pieces in a pan over medium-high heat until they are perfectly crispy. Transfer the cooked bacon to a paper towel-lined plate to drain, saving that flavorful rendered fat! Next, brown the ground beef in the remaining bacon butter. Break it apart with a spoon as it cooks until it’s fully browned. Turn off the heat and stir in the sugar-free ketchup, light mayo, Dijon mustard, Worcestershire sauce, and pickle juice. Mix everything thoroughly until the sauce has thickened and coated the beef beautifully.
- Assemble and Melt: Once the fries are done and glistening, remove them from the oven. Season them with a few pinches of kosher salt to taste. You can either gently push all the fries together into the center of the sheet pan, or for a cozier presentation, transfer them to a quarter sheet pan or a cast iron skillet. Evenly place half of the American cheese slices over the fries, followed by the flavorful ground beef mixture. Finish by layering the remaining cheese slices on top. Pop it back into the oven for just 2-3 minutes, or until the cheese is gloriously melted and bubbly.
- Garnish and Serve: The grand finale! Remove your magnificent Cheeseburger Loaded Fries from the oven. Sprinkle with the crispy cooked smoked beef bacon pieces. Now comes the fun part: add your favorite toppings! Fresh chives, tangy diced pickles or relish, or a handful of chopped pickled peppers are always a hit. Serve immediately while everything is hot and gooey, and enjoy every single bite!
The Secret to Seriously Crispy Fries
Achieving that perfect crunch for your Cheeseburger Loaded Fries is easier than you think! Whether you’re making them from scratch or using store-bought, a few tricks make all the difference.
- Homemade Fries: For maximum crispness, use Russet potatoes. After cutting, soak them in cold water for 30 minutes to remove excess starch. Pat them completely dry before tossing with oil and seasonings. Baking at a high temperature (450ºF) ensures a crispy exterior.
- Frozen Fries: The key here is not to overcrowd the pan. Spread them in a single layer on a baking sheet. Patting them dry before baking can help remove ice crystals. Use the recommended oven or air fryer temperature and ensure good air circulation.
- Equipment: An air fryer is fantastic for fries, as it circulates hot air, delivering superior crispiness with less oil. An oven at a high temperature also works wonderfully if you spread the fries out on a large sheet pan.
Mastering the Melt: The Best Cheese for Cheeseburger Loaded Fries
The right cheese makes all the difference for that irresistible gooey texture in your Cheeseburger Loaded Fries.
- Classic Melty Cheese: American cheese slices are truly ideal for classic loaded fries. They melt incredibly smoothly and evenly, creating that perfect, stretchy blanket over your fries and beef. Layering half the cheese, then the beef, then the remaining cheese ensures a fantastic, consistent melt throughout.
- Homemade Cheese Sauce (Optional): For an extra decadent touch, you can make a simple cheese sauce! Melt 2 tablespoons butter, whisk in 2 tablespoons flour (GF option available) to make a roux. Slowly whisk in 1 cup milk until smooth. Stir in 1 cup shredded cheddar or Monterey Jack cheese until melted and smooth. To avoid lumps, add cheese gradually over low heat. If it seizes, a splash of warm milk can help.
- Alternative Cheeses: Other great melting cheeses include Cheddar, Monterey Jack, or a Colby Jack blend. While they might not be as smooth as American cheese, they offer different flavor profiles. Shred your own cheese for the best melt; pre-shredded varieties often contain anti-caking agents.
Amping Up the Flavor: Juicy Ground Beef Tips for Cheeseburger Loaded Fries
The ground beef mixture is the heart of these Cheeseburger Loaded Fries, so let’s ensure it’s bursting with flavor and perfectly juicy.
- Seasoning Blends: Beyond our burger sauce, you can add extra depth. Try a pinch of smoky paprika, a touch of brown sugar for caramelization, onion powder, or even a dash of dried herbs like oregano or thyme.
- Browning Techniques: Don’t overcrowd your pan! Brown the ground beef in batches if needed to ensure it sears instead of steams. A good sear creates delicious crust and deeper flavor. Break the beef into small crumbles for even cooking.
- Moisture & Depth: Our pickle juice and Worcestershire sauce already add great flavor and moisture. For even more richness, you could add a small amount of beef broth or even a splash of dark beer during cooking. This keeps the beef juicy and prevents it from drying out.
Build Your Own Topping Bar for Cheeseburger Loaded Fries
One of the best parts about Cheeseburger Loaded Fries is the endless possibilities for customization! Set up a topping bar and let everyone create their perfect plate.
| Category | Topping Suggestions |
|---|---|
| Fresh | Diced red onion, chopped fresh tomatoes, shredded lettuce, fresh chives |
| Saucy | BBQ sauce, sriracha mayo, ranch dressing, hot sauce, avocado crema |
| Savory | Crispy fried onions, caramelized onions, sautéed mushrooms, pickled jalapeños, fried egg |
| Classic | Smoked beef bacon pieces, diced pickles or relish, chopped pickled peppers |
Make-Ahead & Meal Prep Tips for Your Cheeseburger Loaded Fries
Making these delicious Cheeseburger Loaded Fries can be even more stress-free with a little planning! Here’s how to prep components ahead of time, ensuring a quicker assembly later.
You can prepare several elements 1-2 days in advance. Cook the ground beef mixture completely and store it in an airtight container in the refrigerator. The burger sauce can also be mixed and stored separately. Chop all your fresh toppings like chives or pickles, and keep them in individual containers. When it’s time to eat, simply bake your fries, reheat the beef mixture gently on the stovetop, assemble, and melt the cheese!
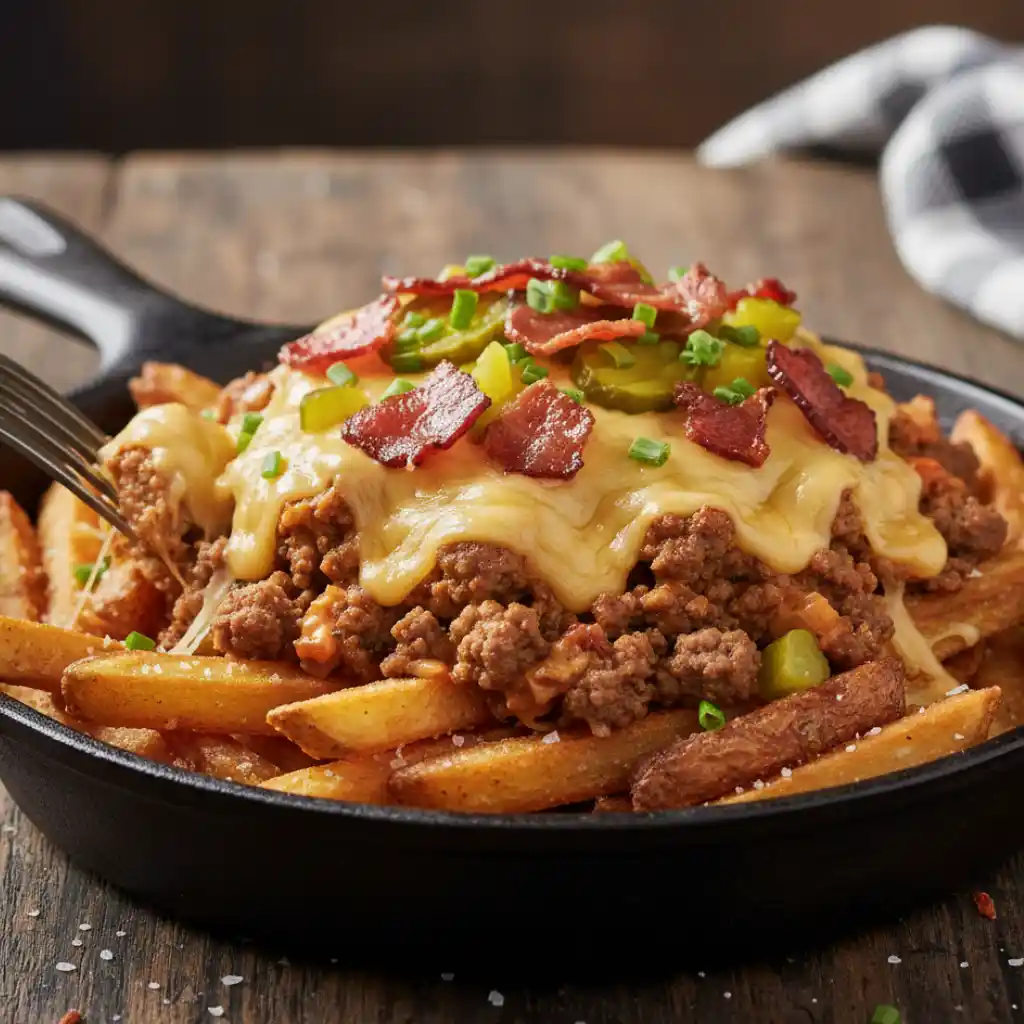
Troubleshooting Common Issues with Cheeseburger Loaded Fries
Don’t fret if things aren’t perfect; I’m here to help! Here are some common issues and how to fix them for your Cheeseburger Loaded Fries.
- Soggy Fries: Ensure fries are in a single layer with plenty of space on the pan. Don’t overcrowd your oven or air fryer. Serve immediately after assembly; loaded fries are best fresh!
- Bland Beef: Taste the beef mixture before assembling! You can always add more salt, pepper, a dash of garlic powder, or an extra splash of Worcestershire sauce to boost the flavor.
- Separated Cheese Sauce: If you’re making your own cheese sauce and it separates, ensure you’re adding the cheese gradually over low heat. To recover, whisk in a tablespoon of warm milk or cream slowly until it comes back together.
- Overcooked Beef: To keep beef juicy, don’t cook it longer than necessary to brown. Remove from heat as soon as it’s cooked through, then add the sauce ingredients.
Alternative Fry Bases & Dietary Adaptations for Cheeseburger Loaded Fries
This recipe is incredibly versatile! You can easily adapt these Cheeseburger Loaded Fries to suit different tastes or dietary needs.
- Other Bases: Instead of Russet fries, try sweet potato fries for a touch of sweetness, crispy curly fries, classic tater tots, or even homemade potato wedges. Adjust baking times as needed for each.
- Dietary Needs: For gluten-free, ensure your Worcestershire sauce is GF-certified, and if making a cheese sauce, use GF flour. For dairy-free, use your favorite plant-based cheese shreds or slices, and swap regular mayo for a vegan variety. For a delicious vegetarian/vegan option, substitute the ground beef with plant-based ground “meat” or seasoned lentils, and use vegan bacon alternatives if desired.
Storing & Reheating Your Cheeseburger Loaded Fries
While these Cheeseburger Loaded Fries are truly best enjoyed fresh, I understand that sometimes leftovers happen! Here’s how to handle them.
Store any leftover loaded fries in an airtight container in the refrigerator for up to 2 days. To reheat and restore some crispness, spread them on a baking sheet and bake in a preheated oven at 350ºF for 10-15 minutes, or until warmed through and the fries have crisped up a bit. An air fryer at 350ºF for 5-7 minutes also works well. I don’t recommend microwave reheating, as it can make the fries soggy.
Frequently Asked Questions About Cheeseburger Loaded Fries
Can I deep fry the fries instead?
Yes, you certainly can! Deep fry your fries in oil heated to 350°F (175°C) until golden brown and crispy, then proceed with the recipe.
What’s the best ground beef fat ratio to use?
I recommend a leaner blend like 90/10 or 96/4 to prevent the dish from becoming overly greasy. You want the flavor, not excess fat.
How many servings does this recipe make as a main dish vs. an appetizer?
This recipe comfortably serves 2-3 as a hearty main course, but it can easily serve 4-6 people as a generous appetizer.
Can I use different types of cheese?
Absolutely! While American cheese gives the best melt, feel free to experiment with shredded cheddar, Monterey Jack, or even a spicy pepper jack for extra kick.
Conclusion
There you have it—a truly satisfying recipe for Cheeseburger Loaded Fries that’s perfect for any occasion! I hope you feel encouraged to dive into your kitchen and create this wonderfully comforting dish. The joy of a crispy fry, savory beef, and gooey cheese all in one bite is truly unmatched. I just know your family and friends will adore this fun meal as much as mine does. Please leave a comment below with your favorite topping combinations or any questions you might have! Happy cooking, my friends!

