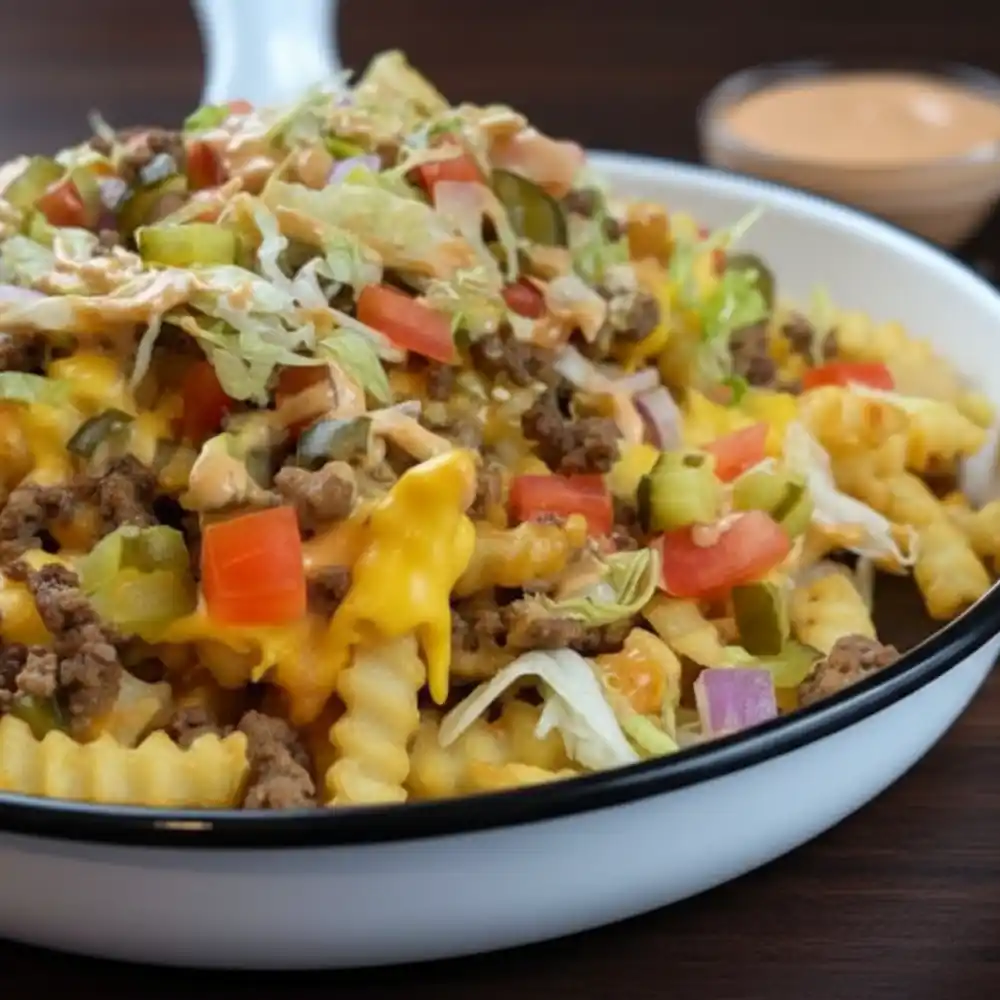
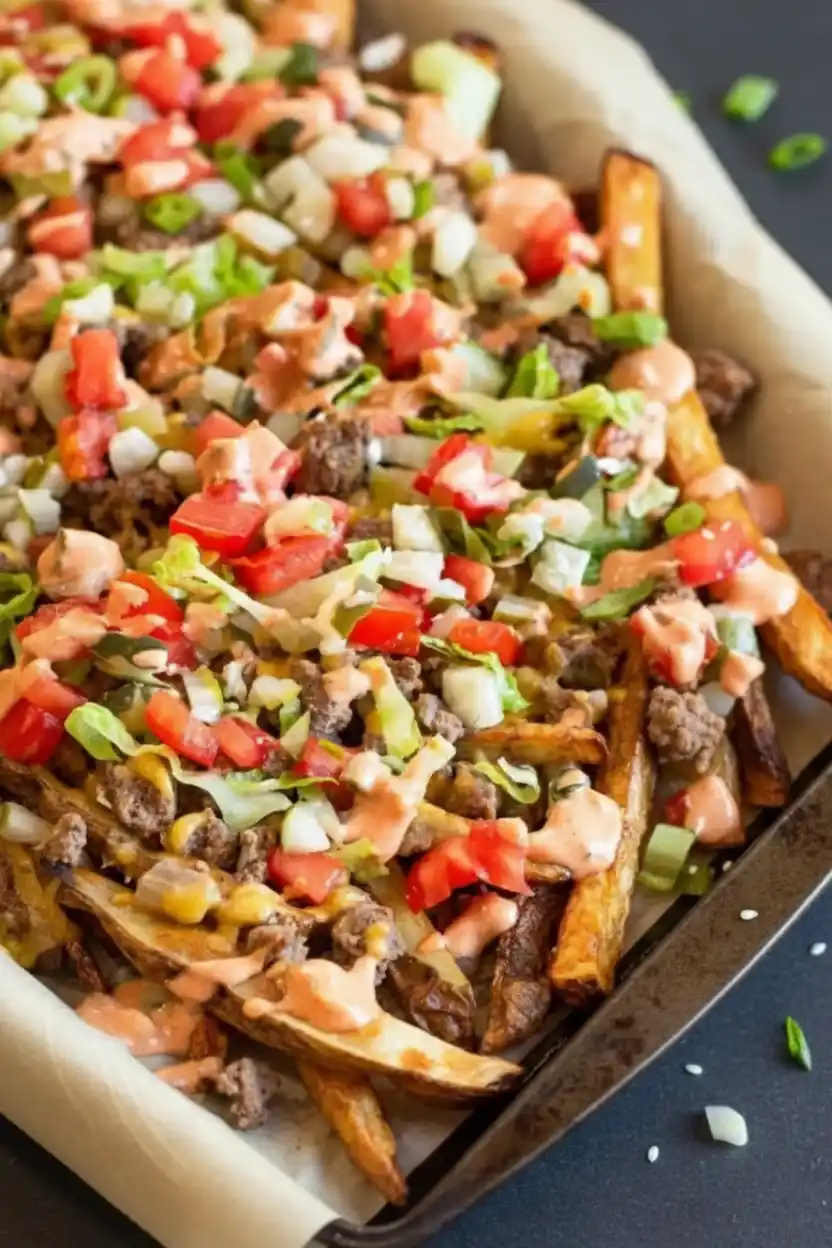
Hey there, friend! Sarah here, and I’m so excited to share one of my favorite comfort food mash-ups with you today: Cheeseburger Fries! Imagine all the juicy, savory goodness of a classic cheeseburger piled high on a bed of perfectly crispy fries. It’s a delightful, easy-to-make dish that brings big smiles to the dinner table, and it’s ready in about an hour. Get ready to transform your weeknight meal into a joyful and unforgettable experience!
Table of Contents
Why You’ll Adore These Cheeseburger Fries
I truly believe this recipe for Cheeseburger Fries will become a quick family favorite in your home, just like it is in mine! It’s designed to be simple, satisfying, and utterly delicious. I know you’ll love the playful twist on a classic and how easily it fits into a busy schedule.
- Customizable Comfort: Tailor your toppings to exactly what your family loves, making every bite a personal delight.
- Crispy Perfection: We’ll focus on achieving that ideal crispiness for your fries, creating the perfect base for all those yummy toppings.
- Irresistible Flavors: Experience all the classic burger tastes—savory beef, melted cheese, fresh veggies, and a tangy sauce—in every forkful.
- Weeknight Winner: This is a fantastic one-pan meal that keeps cleanup minimal and satisfaction high, freeing up your precious time.
Mastering the Fries: Your Guide to Perfect Cheeseburger Fries
The secret to truly amazing Cheeseburger Fries starts with, well, the fries! Achieving that golden, crispy exterior and fluffy interior is key. I’m going to walk you through how to get perfect fries, making sure they’re the ideal foundation for all your delicious toppings.
Fry Type Showdown: Which Fries Work Best?
Selecting the right potato is the first step to incredible fries. Here’s a quick guide to help you choose the best spuds for your Cheeseburger Fries adventure.
| Fry Type | Texture | Topping Hold | Ease of Preparation |
|---|---|---|---|
| Russet (Homemade) | Crispy exterior, fluffy interior | Excellent, sturdy | Medium (requires cutting) |
| Frozen Crinkle Cut | Good crunch, classic diner feel | Great, nooks and crannies hold sauce | Very easy (oven/air fryer) |
| Frozen Shoestring | Very crispy, light | Okay, can get lost in toppings | Very easy (quick cooking) |
| Frozen Steak Fries | Meaty, softer interior | Good, thick enough for heavy toppings | Easy (longer cook time) |
For this recipe, I’m guiding you to make your own delicious russet potato fries, which are just fantastic.
Achieving Peak Crispiness: Oven, Air Fryer, or Deep Fryer?
No one wants soggy fries! Here’s how I get mine perfectly crispy, no matter your preferred cooking method. The goal is even heat and enough space for moisture to escape.
- Oven Baking (My go-to!): This is my favorite method for a hands-off approach. After cutting your russet potatoes into 1/2-inch matchsticks, toss them with a little olive oil, salt, and pepper. Spread them in a single layer on parchment-lined baking sheets, making sure there’s space between each fry for airflow. I bake mine at a hot 450°F (232°C) for 30-35 minutes, flipping them once halfway through. This high heat is crucial for browning and crisping. Don’t overcrowd the pan, or they’ll steam instead of crisp!
- Air Frying: If you have an air fryer, this is an excellent choice for super crispy fries with less oil. Toss your cut potatoes with a tiny bit of oil and seasonings. Preheat your air fryer to 375°F (190°C). Cook in batches for 15-20 minutes, shaking the basket every 5 minutes, until golden brown and crispy. Avoid overloading the basket.
- Deep Frying: For the ultimate indulgence, deep frying delivers restaurant-quality crispiness. Heat about 2-3 inches of oil in a heavy-bottomed pot to 325°F (160°C). Fry potatoes in small batches for 5-7 minutes until softened but not browned. Remove and drain. Increase oil temperature to 375°F (190°C). Return fries to the hot oil for another 2-4 minutes, until golden and very crispy. Drain on a wire rack. This “double-fry” method is a game-changer!
No matter which method you choose, remember that proper spacing and a good toss with oil are your best friends in preventing soggy fries.
The Ultimate Cheeseburger Fries Recipe
Ingredients
Equipment
Method
- First, wash your russet potatoes thoroughly and cut them into 1/2-inch matchsticks or fries. Line two large baking sheets with parchment paper and add the cut fries. Toss them with 1 tablespoon of olive oil, salt, and pepper to evenly coat. Spread the fries out on the baking sheets, making sure to leave some room in between them for even airflow. Bake at 450 degrees F (230°C) for 30-35 minutes, flipping once halfway through, until golden and crisp.
- While your fries bake, let’s whip up that essential burger sauce! You can absolutely use store-bought, but a homemade version adds a special touch. To make about 1/2 cup of sauce, combine 1/2 cup mayonnaise, 1 tablespoon ketchup, 1 teaspoon yellow mustard, 1 teaspoon sweet pickle relish, 1/4 teaspoon smoked paprika, a pinch of garlic powder, and a dash of onion powder. Stir until everything is well combined and creamy.
- Next, it’s time to get all your delicious toppings ready for these amazing Cheeseburger Fries. Chop your lettuce, dice your tomatoes, and finely dice your dill pickles. Shred your cheddar cheese if it’s not pre-shredded. Set all these vibrant ingredients aside.
- When your fries have about 8 minutes left in the oven, start on the ground beef. Heat a large skillet over medium-low heat. Once hot, add the remaining 1/3 tablespoon of olive oil and let it get hot for about 30 seconds. Add the diced yellow onions, along with a pinch of salt and pepper, and sauté for 4-5 minutes until they are soft and golden brown. Add the ground beef and break it up with the back of a large spoon. Cook for about 7 minutes, adding the dijon mustard halfway through and stirring occasionally. Continue to cook until the beef is fully browned. Add salt and pepper to taste, ensuring the meat is perfectly seasoned for your ultimate fry feast.
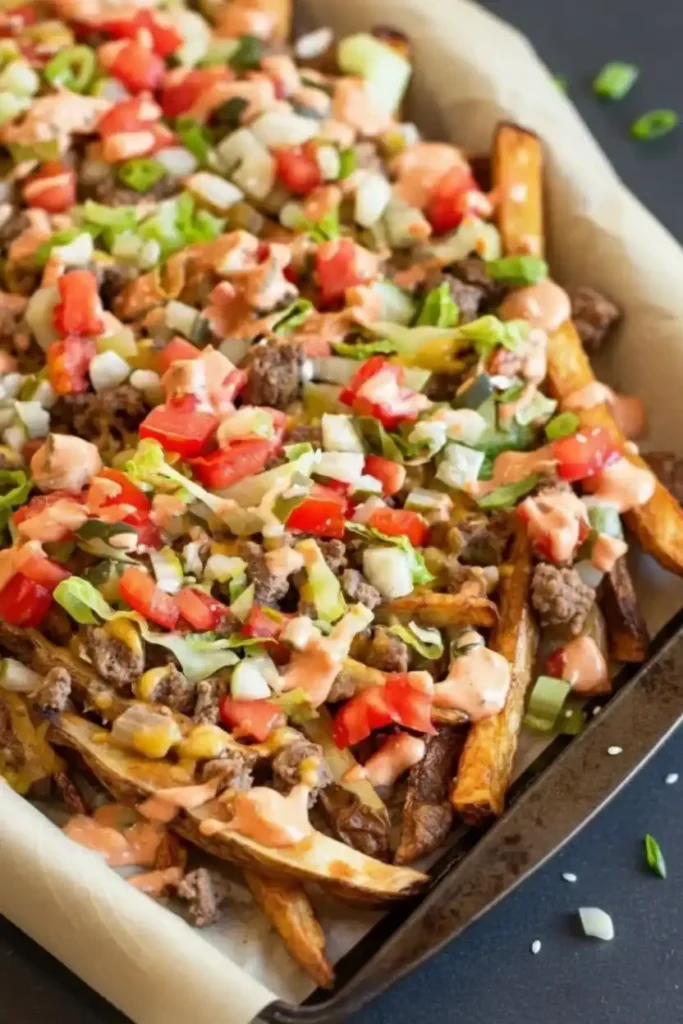
- Once your fries are done baking, carefully transfer them to one large baking sheet, arranging them in a somewhat even layer. Turn down your oven to 350 degrees F (175°C). Top the fries with the cooked ground beef mixture, spreading it out evenly, then sprinkle generously with the shredded cheddar cheese. Place the baking sheet back in the preheated oven and let the cheese melt for about 3-5 minutes, until it’s bubbly and gooey.
- When the cheese is beautifully melted, carefully remove the baking sheet from the oven. Now for the fun part: loading up those amazing cheeseburger loaded fries! Evenly distribute the shredded lettuce, diced tomatoes, and chopped dill pickles over the cheesy beef and fries. Finish by generously drizzling over the prepared burger sauce dressing. Serve your delicious creation right away and enjoy every savory bite!
Notes
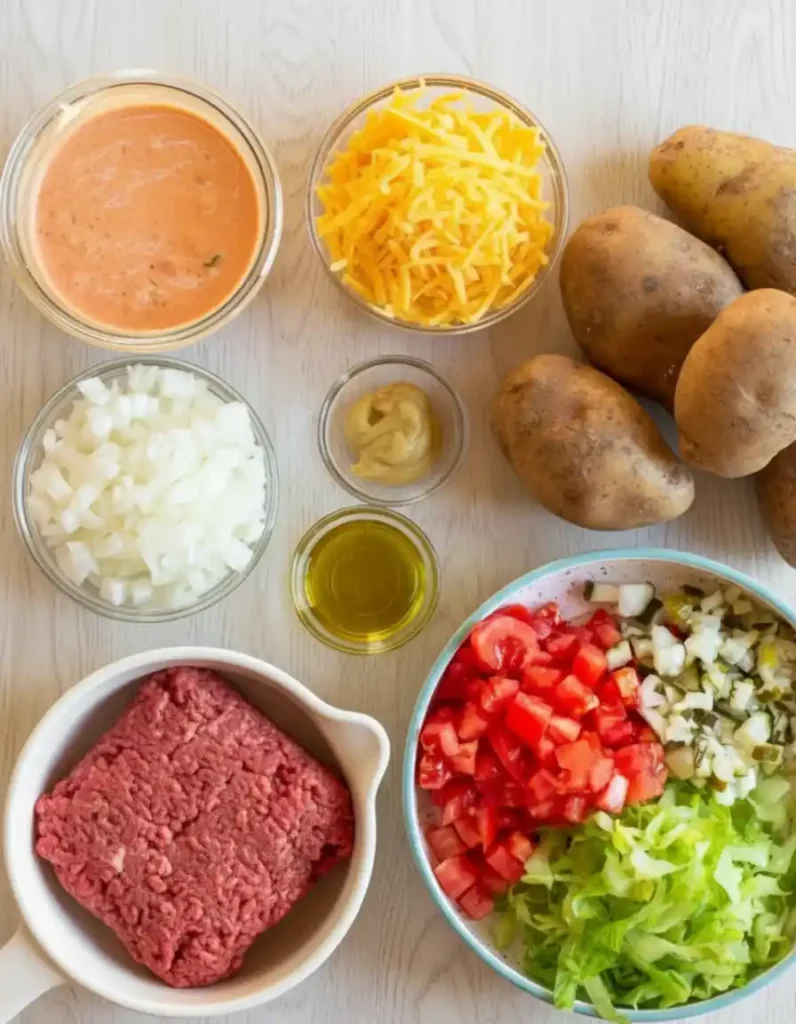
Cheeseburger Fries Ingredients
Here’s exactly what you’ll need to create your incredible Cheeseburger Fries. I love how simple these ingredients are, yet they pack such a flavor punch!
- 2 pounds russet potatoes
- 1 1/3 tablespoon olive oil (divided)
- 1 cup diced yellow onion (120 grams)
- 1 pound ground beef (I used 90/10) – this is a staple for a comforting ground beef and potatoes recipe
- 1 tablespoon dijon mustard
- 1 cup shredded cheddar cheese (3 ounces)
- 1 packed cup shredded lettuce (85 grams)
- 1 cup diced tomatoes (150 grams)
- 1 cup diced dill pickles (75 grams)
- 1/4 cup burger sauce
- salt and pepper, to taste
How to Make Your Dreamy Cheeseburger Fries
Making these Cheeseburger Fries is a fun and straightforward process. Just follow these steps, and you’ll have a fantastic meal ready in no time. I’ve broken it down to make sure you feel confident at every stage!
- Prep your fries. Wash potatoes and cut into 1/2 inch matchsticks/fries. Line 2 large baking sheets with parchment paper and add fries. Toss with oil and salt and pepper to evenly coat. Spread out on the baking sheets, making sure to leave some room in between them for even airflow. Bake at 450 degrees for 30-35 minutes, flipping once halfway through.
- Make the special sauce while the fries cook. You can also use store-bought.
- Prep your favorite burger toppings. Chop lettuce, tomatoes, and pickles, and shred your cheese. Set aside.
- Make the mustard-ground beef. When there are about 8 minutes left on the fries, make your ground beef. Heat a large skillet over medium-low heat. Once hot, add oil and let it get hot, about 30 seconds. Add onions and salt and pepper and sauté for 4-5 minutes until soft and golden brown. Add ground beef and break it up with the back of a large spoon. Cook for about 7 minutes, adding mustard halfway through and stirring occasionally. Add salt and pepper to taste.
- Melt the cheese. When your fries are done, move to one large baking sheet in a somewhat even layer. Turn down the oven to 350 degrees. Top with cooked ground beef mixture and sprinkle with shredded cheese. Place back in the oven and let the cheese melt for about 3-5 minutes.
- Load up those fries! When the cheese is melted, remove them from the oven and top with the remaining ingredients. Evenly distribute with shredded lettuce, diced tomatoes, and chopped pickles. Drizzle over special sauce dressing.
- Enjoy right away!
The Secret Sauce: Our Signature Burger Dressing
Every great burger, and by extension, every great plate of Cheeseburger Fries, needs a fantastic sauce to tie all the flavors together. This “special sauce” is that magical ingredient! It provides a creamy, tangy, and slightly sweet contrast to the savory beef and crispy fries, truly mimicking that classic burger experience. You can easily whip up your favorite homemade burger sauce using ingredients like mayonnaise, ketchup, mustard, a touch of pickle relish, and a dash of paprika. Or, for a super convenient option, grab a high-quality store-bought burger sauce. Just a drizzle makes all the difference!
Smart Shortcuts & Make-Ahead Tips for Your Cheeseburger Fries
Life gets busy, and I’m all about making delicious meals fit into a real-life schedule. These smart shortcuts and make-ahead tips will help you get these delightful Cheeseburger Fries on the table even faster without sacrificing flavor or fun.
- Chop Ahead: Dice your onions, tomatoes, and pickles the day before. Shred your cheddar cheese too! Store them in separate airtight containers in the fridge.
- Cook the Beef: You can cook the seasoned ground beef mixture a day or two in advance. Store it in an airtight container in the refrigerator and simply reheat gently in a skillet or microwave before assembling.
- Prepare the Sauce: If you’re making your own burger sauce from scratch, it can absolutely be prepared several days ahead of time and stored in the fridge. This makes assembly a breeze.
- Frozen Fries: If you’re short on time, using high-quality frozen crinkle-cut or shoestring fries is a perfectly acceptable shortcut. Just follow the package instructions for oven or air fryer cooking to ensure they’re perfectly crispy.
With a little prep, you can turn this into a speedy cheeseburger meal that’s ready to go when hunger strikes!
Customizing Your Cheeseburger Fries: Endless Possibilities!
One of the most joyful things about Cheeseburger Fries is how wonderfully customizable they are! This isn’t just a recipe; it’s a canvas for your culinary creativity. Let your family’s preferences shine and create personalized cheeseburger toppings that everyone will adore.
Flavor Adventures: Creative Cheeseburger Fries Variations
Don’t be afraid to venture beyond the classic! Here are a few flavor-packed ideas to spark your imagination:
- BBQ Cheeseburger Fries: Swap out some of the burger sauce for your favorite smoky BBQ sauce. Top with crispy fried onions or a sprinkle of crumbled bacon.
- Spicy Jalapeño Cheeseburger Fries: Add thinly sliced fresh or pickled jalapeños to the toppings. Drizzle with a sriracha-mayo for an extra kick.
- Mushroom Swiss Cheeseburger Fries: Sauté sliced mushrooms with the onions, then mix them into the ground beef. Use shredded Swiss cheese instead of cheddar for a gourmet touch.
- Western Cheeseburger Fries: Add a dollop of chili and a sprinkle of crispy bacon bits before adding the lettuce and tomatoes.
Dietary Swaps & Healthier Cheeseburger Fries Options
Making these Cheeseburger Fries work for everyone is easy with a few simple tweaks.
| Dietary Need | Swap/Option | Notes |
|---|---|---|
| Vegetarian/Vegan | Plant-based ground crumble, black bean burger patty | Cook as you would ground beef. |
| Dairy-Free | Dairy-free shredded cheddar alternative | Many great options available in stores. |
| Gluten-Free | Stick to potato fries (naturally GF) | Ensure all other ingredients (sauce, spices) are certified gluten-free. |
| Healthier Choice | Leaner ground turkey or chicken; sweet potato fries | Opt for 93/7 or 99/1 ground meat. Sweet potato fries add extra nutrients. |
Kid-Friendly Cheeseburger Fries: Making it Fun for Everyone
Getting the little ones excited about dinner is always a win! For younger eaters or picky children, consider these simple adaptations for your Cheeseburger Fries:
- Deconstructed: Serve the plain fries, cooked beef, and cheese separately on their plate, letting them add toppings themselves.
- Milder Toppings: Stick to just cheese and maybe a little ketchup or a tiny bit of burger sauce.
- Mini Servings: Cut the fries smaller or use shoestring fries, Making it Fun for Everyone for small hands to manage.
Troubleshooting Common Cheeseburger Fries Conundrums
Even the most seasoned home cooks encounter little hiccups! Don’t fret if something doesn’t go exactly as planned with your Cheeseburger Fries. Here are some solutions to common issues you might face, designed to keep your cooking joyful and stress-free.
- My Cheese Isn’t Melting Smoothly: If your cheese looks clumpy or isn’t melting properly, ensure you’re using pre-shredded cheese for even melting. Also, don’t let the oven get too hot when you add the cheese; a moderate temperature around 350°F (175°C) for a few minutes is perfect. You can also cover the baking sheet loosely with foil to create a steamy environment that encourages melting.
- The Ground Beef Tastes Bland: The key to flavorful ground beef is good seasoning! Don’t be shy with salt and pepper, and make sure your onions are properly softened and golden brown before adding the beef. The Dijon mustard adds a wonderful tangy depth. Taste and adjust your seasonings as you go; a little extra salt or a dash of garlic powder can work wonders.
- The Dish Feels Dry: If your Cheeseburger Fries seem a bit dry, don’t hesitate to add more burger sauce! It’s there to provide moisture and flavor. You can also add a splash of beef broth or water to the ground beef mixture while it simmers to keep it juicy.
Remember, cooking is all about learning and adjusting. You’ve got this!
Storing & Reheating Your Leftover Cheeseburger Fries
While these Cheeseburger Fries are best enjoyed fresh, I understand sometimes there are leftovers! Here’s how to properly store and reheat them so they remain as delicious as possible. The goal is to preserve crispness and flavor.
To store, let your leftover Cheeseburger Fries cool completely. Separate the fries and beef mixture from the fresh toppings (lettuce, tomatoes, pickles, sauce). Place the fries and beef in an airtight container in the refrigerator for up to 2-3 days. Store the fresh toppings and sauce in separate containers to prevent sogginess.
When reheating, avoid the microwave, as it will make the fries soggy. For best results, spread the fries and beef mixture on a baking sheet and reheat in a preheated oven or air fryer at 350°F (175°C) for 10-15 minutes, or until heated through and crispy again. Once hot, add the fresh toppings and a fresh drizzle of sauce.
Are Cheeseburger Fries “Healthy”? A Balanced Perspective
As a home cook, I believe in enjoying delicious food in a balanced way. Cheeseburger Fries can definitely be part of a joyful diet when approached mindfully. It’s an indulgent dish, but you can make smart choices to balance it out without sacrificing taste.
Consider portion control to enjoy this comforting meal responsibly. You can also choose leaner ground turkey or chicken for your cheeseburger creation, load up on extra fresh vegetables like shredded carrots or bell peppers, or opt for sweet potato fries for added nutrients. For inspiration on incorporating more vegetables into a comforting dish, explore a healthy one-pan meal that features ground beef and potatoes with colorful veggies. It’s all about finding that happy medium where enjoyment meets nourishment.
| Component | Healthier Swaps/Tips |
|---|---|
| Protein | Use lean ground turkey or 93/7 lean ground beef |
| Fries | Bake homemade, use sweet potato fries |
| Cheese | Opt for reduced-fat cheddar, use less |
| Toppings | Pile on extra fresh veggies (lettuce, tomato) |
| Sauce | Use a lightened-up burger sauce, or a smaller portion |
Essential Tools for Crafting the Best Cheeseburger Fries
Having the right tools makes cooking so much more enjoyable and effective! Here are a few essential kitchen items that will help you create the most delicious Cheeseburger Fries with ease.
- Sharp Chef’s Knife: Essential for safely and efficiently cutting your potatoes into perfect matchsticks and dicing your veggies.
- Large Cutting Board: Provides a stable, spacious surface for all your chopping and prepping.
- Two Large Baking Sheets: Crucial for spreading fries in a single layer, ensuring maximum crispiness and even baking.
- Parchment Paper: Prevents sticking and makes cleanup a breeze, especially with fries and melted cheese.
- Large Skillet: Perfect for browning the ground beef and sautéing onions evenly.
- Sturdy Spatula or Spoon: For breaking up ground beef and stirring ingredients while cooking.
These tools are your allies in the kitchen, helping you craft a delightful meal!
Conclusion: Your Ultimate Cheeseburger Fries Await!
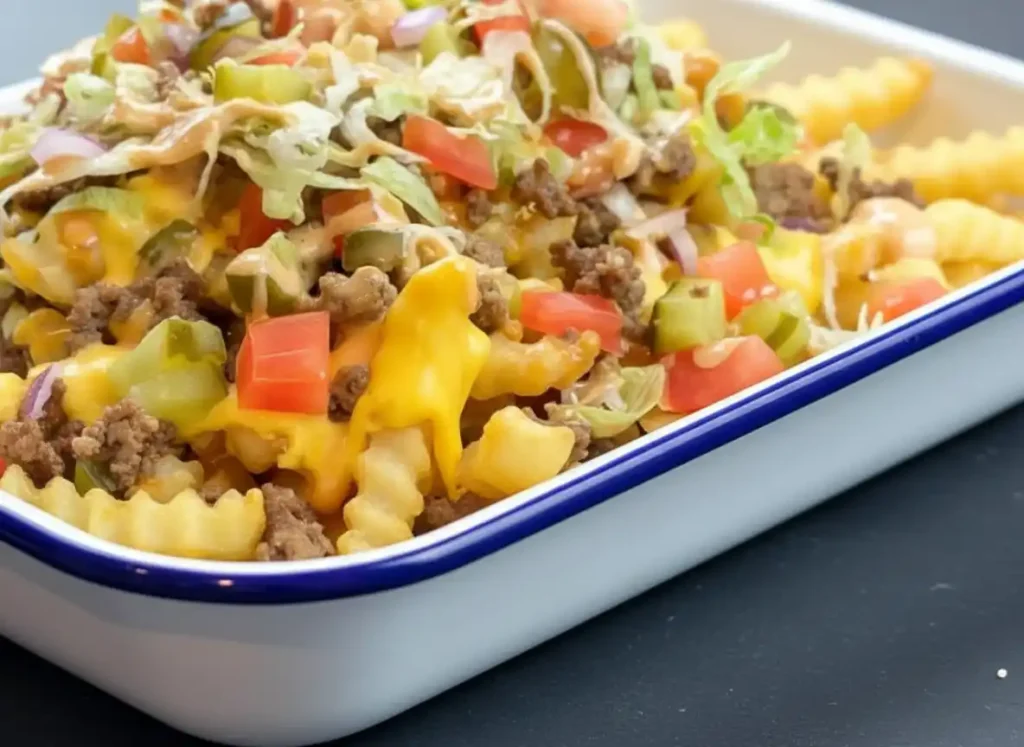
And there you have it, friends – everything you need to create your very own batch of unbelievably delicious Cheeseburger Fries! I hope you feel encouraged and joyful about trying this fun and satisfying recipe. It’s such a wonderful way to bring comfort and smiles to your dinner table, turning a simple meal into a memorable experience.
Frequently Asked Questions About Cheeseburger Fries
Can I use frozen fries instead of fresh potatoes?
Absolutely! High-quality frozen fries work great. Just follow the package directions for cooking time and temperature to ensure they get crispy before adding toppings.
Can I use frozen fries instead of fresh potatoes?
Absolutely! High-quality frozen fries work great. Just follow the package directions for cooking time and temperature to ensure they get crispy before adding toppings.
What if I don’t have Dijon mustard for the beef?
You can substitute with a good quality yellow mustard, but Dijon adds a unique tanginess. If you omit it, just make sure to season the beef well with salt and pepper.
Can I make the ground beef ahead of time?
Yes, you can cook the seasoned ground beef mixture up to two days in advance. Store it in the fridge and gently reheat before assembling your Cheeseburger Fries.
What’s the best way to get truly crispy fries?
The keys are to avoid overcrowding the baking sheet or air fryer basket, use enough oil, and cook at a high temperature until golden brown. Flipping halfway through baking also helps!
Can I add other toppings?
Of course! Think crispy bacon bits, sautéed onions, pickled jalapeños, or even a fried egg. Get creative with your Cheeseburger Fries!

