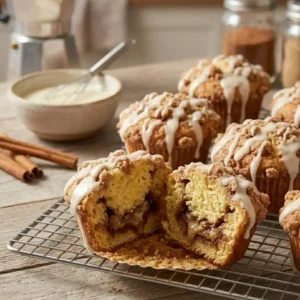
Divine Vanilla Magic Custard Cake Delight
I remember the first time I baked a Vanilla Magic Custard Cake. It felt like pure kitchen wizardry! One moment, you have a single, runny batter, and the next, your oven produces a spectacular three-layered dessert. This cake is a dream come true for anyone who loves a bit of wonder in their baking. It’s an approachable recipe that yields impressive results, making it an excellent choice for any home cook.
Table of Contents
Why You’ll Love This Vanilla Magic Custard Cake
- Spectacular Layers: This cake transforms a single batter into three distinct textures: a dense custard on the bottom, a smooth creamy center, and a light sponge top.
- Straightforward Process: You use common pantry items and follow clear steps for a stunning outcome. No complex techniques are required to achieve this amazing texture.
- Subtle Sweetness: The delicate vanilla flavor and moderate sweetness make this Vanilla Magic Custard Cake a comforting treat for any occasion.
What is Magic Custard Cake? And How Does the “Magic” Happen?
Magic Custard Cake is a unique dessert made from a single, thin batter that separates into three distinct layers during baking. This isn’t a trick; it’s a bit of culinary science! The “magic” happens thanks to the varying densities of the ingredients and the way the egg whites are incorporated.
As the cake bakes, the heavier egg yolk mixture sinks to the bottom, forming the dense custard. The milk and butter components create a luscious, creamy middle layer. The whipped egg whites, which are folded in last, rise to the top, creating an airy, sponge-like crust. It’s truly fascinating to watch it unfold in your oven!


The Ultimate Vanilla Magic Custard Cake
Ingredients
Equipment
Method
- Preheat your oven to 325°F.
- Prepare your dish: Lightly grease an 8×8 inch baking dish and set it aside. This helps prevent sticking.
- Whip the egg whites: In a clean bowl, whip the egg whites until they form stiff peaks. They should hold their shape when you lift the whisk. Set these aside carefully.
- Beat yolks and sugar: In a separate large bowl, beat the egg yolks and powdered sugar together until the mixture is pale yellow and creamy.
- Add butter and water: Mix in the melted butter and the tablespoon of water for about two minutes until everything is evenly combined.
- Incorporate flour: Gently mix in the flour until it is just evenly incorporated. Avoid overmixing here.
- Add milk and vanilla: Slowly beat in the lukewarm milk and vanilla extract until the batter is smooth and well combined. The batter will be quite thin; this is normal.
- Fold in egg whites: Add the whipped egg whites to the batter in three additions. Gently fold them in with a spatula, using an upward motion to incorporate them without deflating them too much. Leave small pockets or wisps of egg white, as these help form the lovely sponge top.
- Bake the cake: Pour the runny batter into your prepared 8×8 inch pan. Bake for 40-60 minutes. The cake is done when the top is golden and the center is barely jiggly when you gently shake the pan, like a thick custard. If the top browns too quickly before 40 minutes, you can loosely cover the cake with aluminum foil.
- Cool completely: Let the cake cool completely on a wire rack before dusting it with powdered sugar. It will still be slightly jiggly even when cooled due to the delicate custard layer in the middle.
Notes
Ingredients for Your Vanilla Magic Custard Cake
Gather these items for your baking adventure:
- 1/2 cup unsalted butter – melted and slightly cooled
- 2 cups milk – lukewarm
- 1 and 1/4 cups (150 g) powdered sugar
- 4 eggs – separated
- 1 Tablespoon water
- 1 cup (115g) flour
- 2 teaspoon vanilla extract
- powdered sugar for dusting
How to Make Vanilla Magic Custard Cake: Step-by-Step Instructions
Baking this incredible Vanilla Magic Custard Cake is a fun and rewarding process. Follow these steps for success:
- Preheat your oven to 325°F.
- Prepare your dish: Lightly grease an 8×8 inch baking dish and set it aside. This helps prevent sticking.
- Whip the egg whites: In a clean bowl, whip the egg whites until they form stiff peaks. They should hold their shape when you lift the whisk. Set these aside carefully.
- Beat yolks and sugar: In a separate large bowl, beat the egg yolks and powdered sugar together until the mixture is pale yellow and creamy.
- Add butter and water: Mix in the melted butter and the tablespoon of water for about two minutes until everything is evenly combined.
- Incorporate flour: Gently mix in the flour until it is just evenly incorporated. Avoid overmixing here.
- Add milk and vanilla: Slowly beat in the lukewarm milk and vanilla extract until the batter is smooth and well combined. The batter will be quite thin; this is normal.
- Fold in egg whites: Add the whipped egg whites to the batter in three additions. Gently fold them in with a spatula, using an upward motion to incorporate them without deflating them too much. Leave small pockets or wisps of egg white, as these help form the lovely sponge top.
- Bake the cake: Pour the runny batter into your prepared 8×8 inch pan. Bake for 40-60 minutes. The cake is done when the top is golden and the center is barely jiggly when you gently shake the pan, like a thick custard. If the top browns too quickly before 40 minutes, you can loosely cover the cake with aluminum foil.
- Cool completely: Let the cake cool completely on a wire rack before dusting it with powdered sugar. It will still be slightly jiggly even when cooled due to the delicate custard layer in the middle.
Expert Tips for the Best Magic Custard Cake
Achieving that signature three-layer texture is straightforward with a few key considerations:
- Room Temperature Ingredients: Ensure your eggs and milk are at room temperature. This helps create a smooth, emulsified batter, preventing lumps and ensuring even baking.
- Measure Flour by Weight: For precise results and the correct cake structure, use a kitchen scale to measure the flour. Grams are more accurate than volume measurements.
- Do Not Overbake: Overbaking can result in a rubbery custard layer. Look for that “barely jiggly” center to ensure it retains its creamy texture.
- Quality Vanilla: Use a good quality vanilla extract. Since vanilla is the primary flavor, it makes a significant difference in the final taste of your Vanilla Magic Custard Cake.
- Gentle Folding: Be gentle when folding in the egg whites. You want to incorporate them without deflating all the air, which is crucial for the top sponge layer.
Equipment You’ll Need
Having the right tools makes baking this magic custard cake a joy. Here’s what I recommend:
- 8×8 inch baking dish: A glass or ceramic dish works well for even baking.
- Stand mixer or hand mixer: Essential for whipping egg whites and beating yolks efficiently.
- Rubber spatula: For gently folding in the egg whites.
- Kitchen scale: For accurate flour measurement, ensuring optimal texture.
Ingredient Substitutions & Variations
Explore these options to customize your cake, whether you’re looking for different flavors or gluten-free alternatives.
| Ingredient/Variation | Substitution/Suggestion | Impact/Notes |
|---|---|---|
| Milk | Full-fat coconut milk (canned) | Will impart a coconut flavor; texture might be slightly denser. |
| Half-and-half | Will result in a richer, even creamier custard layer. | |
| Flour | 1:1 Gluten-Free Flour Blend (with xanthan) | Baking time might slightly increase; always use a blend designed for baking. |
| Butter | Salted butter | Omit any added salt in the recipe (though this recipe doesn’t call for it) or reduce powdered sugar slightly. Unsalted is preferred for control. |
| Sugar | Granulated sugar | Powdered sugar dissolves faster and creates a smoother batter. Granulated may leave a slightly grainy texture and affect the layers. |
| Flavor | 1 tsp almond extract | Add with vanilla for a complementary flavor. |
| 1 Tbsp lemon zest | Add to the egg yolk mixture for a bright citrus note. | |
| 2 Tbsp unsweetened cocoa powder | Sift with flour for a chocolate magic custard cake. May require a touch more milk. |
Common Mistakes and How to Fix Them
Don’t fret if your first Vanilla Magic Custard Cake isn’t exactly as you imagined. Here are common issues and how to resolve them:
- “Why didn’t my cake form layers?” This often happens if egg whites were deflated too much during folding, if you overbaked the cake, or if flour measurement was inaccurate. Ensure gentle folding and measure flour by weight.
- “Why is my custard rubbery/dense?” Overbaking is the main culprit here. Watch for that “barely jiggly” center, then remove it from the oven promptly. Incorrect ingredient ratios can also contribute, so measure carefully.
- “Why is my cake bland?” Ensure you are using a good quality vanilla extract. Sometimes a small pinch of salt (about 1/4 teaspoon) can enhance flavors, even in sweet dishes.
- “Is the batter supposed to be so runny?” Yes, absolutely! The thin, watery consistency of the batter is crucial for the “magic” to happen and for the layers to separate during baking. Trust the process.
- “Why did the top layer split?” This can occur if your oven temperature is too high, causing the top to bake too quickly and crack, or if the cake was overbaked. You can cover the top with foil if it browns too fast.

Storage and Make-Ahead Tips
This Vanilla Magic Custard Cake is a fantastic dessert to prepare in advance.
- Storage: Store any leftover cake covered in the refrigerator. It will keep well for up to 3-4 days. The flavors often deepen and the layers become even more defined overnight.
- Make-Ahead: You can make this cake a day ahead of serving. Allow it to cool completely, then cover and refrigerate. Let it come to room temperature for about 30 minutes before serving for the best texture.
- Freezing: While possible, the texture can change slightly upon thawing. If you freeze it, wrap cooled slices tightly in plastic wrap, then foil. Freeze for up to 1 month. Thaw overnight in the refrigerator before serving.
Baking Pan Options & High-Altitude Adjustments
You have flexibility with your baking pan, and high-altitude baking requires some tweaks.
- Baking Pan Options: An 8×8 inch square pan is standard. You can also use a 9×13 inch pan, but the cake will be thinner, and baking time will reduce (check at 30 minutes). For individual servings, use a muffin tin; fill cavities about halfway and reduce baking time significantly (15-25 minutes). For a larger cake, you can double the recipe and use a 9×13 inch pan, increasing baking time.
- High-Altitude Adjustments (3,000+ feet): At higher altitudes, liquids evaporate faster, and leavening agents work more efficiently. Consider increasing milk by 1-2 tablespoons and flour by 1-2 tablespoons. You might also need to decrease the baking powder (though this recipe doesn’t use it, keep in mind for other recipes) or sugar slightly. Baking time can sometimes be shorter due to faster evaporation, so start checking for doneness earlier.
Serving Suggestions
Your delightful Vanilla Magic Custard Cake deserves a presentation that matches its charm.
- Simple Dusting: A generous dusting of powdered sugar is a classic and elegant finish.
- Fresh Berries: A handful of fresh raspberries, blueberries, or sliced strawberries adds a pop of color and natural tartness.
- Whipped Cream: A dollop of lightly sweetened whipped cream complements the cake’s richness.
- Fruit Compote: A warm berry or stone fruit compote provides a lovely contrast in temperature and flavor.
Frequently Asked Questions about Vanilla Magic Custard Cake
Can I make individual magic custard cakes?
Yes, you can! Pour the batter into greased muffin tins, filling them halfway. Bake for approximately 15-25 minutes, or until set.
What does magic custard cake taste like?
It has a mild, sweet vanilla flavor with a wonderfully complex texture. You get the richness of custard, the creaminess of pudding, and a light sponge top all in one bite.
How do I know when my magic custard cake is set?
The edges should be firm and golden, and the center should still have a slight wobble, similar to a firm Jell-O. Do not bake until fully firm, or it will be dry.
Can I use self-rising flour?
I don’t recommend using self-rising flour for this recipe. It contains leavening agents that are not accounted for in this specific formula, and it could disrupt the delicate layering process.
Conclusion: Share Your Magic with The Meal Craft Family!
Baking this Vanilla Magic Custard Cake is an experience that brings a little enchantment into your kitchen. It’s a testament to how simple ingredients can create something truly special. I hope you feel encouraged to try this incredible recipe and enjoy every spoonful. Please share your experiences and any questions in the comments below, or connect with us on social media using #TheMealCraftMagicCake. Don’t forget to explore more comforting recipes right here on The Meal Craft!